Crochet Turtle Amigurumi – FREE pattern
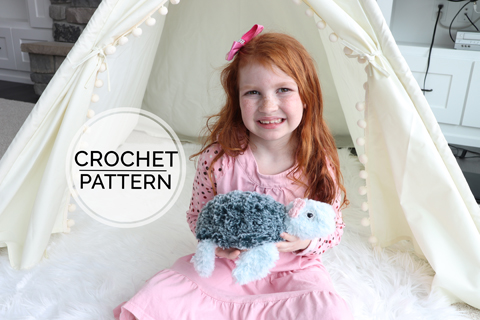
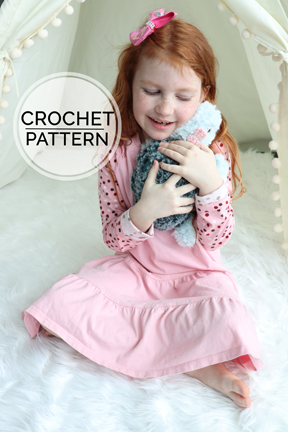
Crochet Turtle For Beginners- In this easy crochet turtle tutorial I will show you step-by-step how to make an EASY crochet turtle. It is a VERY simple amigurumi crochet tutorial. In just a couple of hours you will have an adorable crochet turtle plushie that your baby will love for nap times, car rides, and so much more! This beginner friendly sea turtle will sure to be an adorable addition to any ocean themed nursery, a wonderful baby shower gift, or a great security blanket, the possibilities are truly endless!
By using my affiliate links, I receive a small commission at no extra cost to you. As an Amazon Affiliate I receive a small commission for your purchases, at no extra cost to you.
Available Crochet Turtle Patterns for Purchase
Buy the ad-free paid pdf Crochet Bunny Patterns from my Pattern Shop:
XXS Crochet Turtle
XS Crochet Turtle
Small Crochet Turtle
Medium Crochet Turtle
Materials needed for Faux Fur Amigurumi Turtle
HOOK
10 mm • US size N/P (or hook to obtain gauge)
YARN
Color A (faux fur for Head, Flippers and Bottom Shell)
#6 Super Bulky • Approx 50 yds used
Color B (Eye Socket yarn)
#5 Bulky Weight • Approx 2 yds used
Color C (faux fur yarn for Top Shell)
#6 Super Bulky • Approx 50 yds used
Color D (Circles on the Top Shell yarn)
#4 Worsted Weight • Approx 5 yds used
Color E (Bow yarn)
#4 Worsted Weight • Approx 5 yds used
NOTIONS
Scissors
Darning needle
Poly-fil
12 mm safety eyes
Hot glue to secure safety eyes
GAUGE (4″x 4″), 10 mm hook with Faux Fur
8 sts x 8 rows sc in ea st
GAUGE (4″x 4″), 10 mm hook with Faux Fur
8 sts x 8 rows sc in ea st
FINAL SIZE
11″W x 12″L
Yarns used for Ocean Themed Crochet Baby Turtle
For the body, I used WeCrochet’s Fable Fur in the color Hibou, and for the head and flippers, I used Topo.
For the circles on the back of the shell I used 2 strands of WeCrochet Swish Worsted in the color Estuary Heather.
For the Eye Sockets I used WeCrochet in the color Dove Heather
For the bow, I used 1 strand of WeCrochet Swish Worsted in the color Frosting.
Turtle Head Crochet Pattern
Using one strand of color A (faux fur), 10 mm hook:
Please Note: I use a Stitch Marker so that I know where the row ends and also to mark where the different stitches begin/end.
Rnd 1: Ch 3, sc in 2nd ch from hook, in last ch sc 3 flipping to bottom of chain, sc-inc in last ch, sl st to join. (6)
Rnd 2: Ch 1, sc in ea st around, sl st to join. (6)
Rnd 3: Ch 1, sc in first 2 sts, sc-inc in next st, sc in next 2 sts, sc-inc in last st, sl st to join. (8)
Rnds 4-7: Ch 1, sc in ea st around, sl st to join. (8)
Tie off and weave in ends!
Eye Sockets for Sea Turtle Crochet Pattern
Using one strand of color B, 3.5 mm hook:
Rnd 1: Ch 4, sc in 2nd ch from hook, dc in next ch, sc in last ch, flipping to the bottom of your work sc in the same ch again, dc in next ch, sc in last ch, sl st to join.
Tie off.
ATTACH the (12 mm) plastic safety eyes on the middle chain of the eye socket you just created. I recommend hot gluing the eyes on the inside of the head for extra security.
STUFF Head with poly-fil.
Top Shell for Sea Turtle Crochet Pattern
Using color C (faux fur), 10 mm hook:
The Turtle Shell will connect to the Head and close off the opening, so it is important that you have everything done with the Head, including: safety
eyes attached and hot glued, and stuffing inside of the Head.
Pinching the top and bottom of the back of the head together, continues as follows:
Row 1: Ch 2, insert hook into Head, sc 4 sts across the head, then ch 2. (8)
Row 2: Ch 1, turn, sc-inc in 2nd ch from hook, sc in next 6 sts, sc-inc in last ch. (10)
Row 3: Ch 1, turn, sc in ea st across. (10)
Row 4: Ch 1, turn, sc-inc in first st, sc in next 8 sts, sc-inc in last st. (12)
Row 5: Ch 1, turn, sc in ea st across. (12)
Row 6: Ch 1, turn, sc-inc in first st, sc in next 10 sts, sc-inc in last st. (14)
Rows 7-8: Ch 1, turn, sc in ea st across. (14)
Row 9: Ch 1, turn, sc2tog in first 2 sts, sc in next 10 sts, sc2tog in last 2 sts. (12)
Row 10: Ch 1, turn, sc in ea st across. (12)
Row 11: Ch 1, turn, sc2tog in first 2 sts, sc in next 8 sts, sc2tog in last 2 sts. (10)
Row 12: Ch 1, turn, sc in ea st across. (10)
Row 13: Ch 1, turn, sc2tog in first 2 sts, sc in next 6 sts, sc2tog in last 2 sts. (8)
Row 14: Ch 1, turn, sc2tog in first 2 sts, sc in next 4 sts, sc2tog in last 2 sts. (6)
Row 15: Ch 1, turn, sc2tog in first 2 sts, sc in next 2 sts, sc2tog in last 2 sts. (4)
Row 16: Ch 1, turn, sc2tog in each st. (2)
Row 17: Ch 1, turn, sc2tog in remaining 2 sts. (1)
Tie off, and weave in ends.
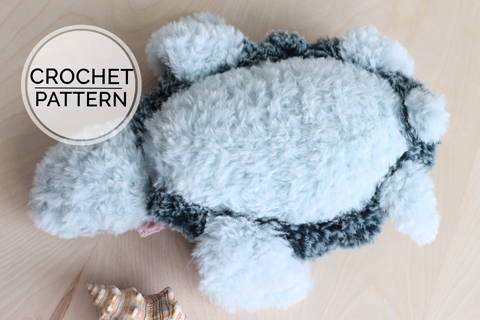
Bottom Shell of Sea Turtle Amigurumi Crochet Pattern
Using color A (faux fur) and 10 mm hook:
The Bottom Shell will be crocheted separately and then crocheted together with the Top Shell in the Edging section.
Row 1: Ch 4, sc-inc in 2nd ch from hook, sc in next ch, sc-inc in last ch. (5)
Row 2: Ch 1, turn, sc-inc in first st, sc in next 3 sts, sc-inc in last st. (7)
Row 3: Ch 1, turn, sc in ea st across. (7)
Row 4: Ch 1, turn, sc-inc in first st, sc in next 5 sts, sc-inc in last st. (9)
Row 5: Ch 1, turn, sc-inc in first st, sc in next 7 sts, sc-inc in last st. (11)
Rows 6-7: Ch 1, turn, sc in ea st across. (11)
Row 8: Ch 1, turn, sc2tog in first 2 sts, sc in next 7 sts, sc2tog in last 2 sts. (9)
Row 9: Ch 1, turn, sc in ea st across. (9)
Row 10: Ch 1, turn, sc2tog in first 2 sts, sc in next 5 sts, sc2tog in last 2 sts. (7)
Row 11: Ch 1, turn, sc2tog in first 2 sts, sc in next 3 sts, sc2tog in last 2 sts. (5)
Row 12: Ch 1, turn, sc2tog in first 2 sts, sc in next st, sc2tog in last 2 sts. (3)
Row 13: Ch 1, turn, sc3tog in remaining 3 sts. (1)
Tie off weave in ends.
Edging of Faux Fur Amigurumi Turtle Crochet Pattern
Using one strand of color C (faux fur), 10mm hook:
Your Bottom Shell will be smaller than your Top Shell, so you will want to skip some of the Top Shell’s stitches/rows. Place the Top Shell with the right side facing down, then place the Bottom Shell (your choice of which side you want facing out) on top. To crochet together both of the shells continue as follows:
Rnd 1: *Sc in the first 2 sts, then skip a top shell stitch/row, then sc in the next 2 sts,* continue the repeat, once you come to the center back point of the shells, sc 3, then continue on the repeat. I had approximately 24 sts, sl st into neck.
For most of Rnd 2 your going to work in the flo (front loop only) so that you can attach the flippers and the tail to the blo (back loop only).
Rnd 2: Ch 1, turn, sc in first 2 sts (sl st does not count as st), *sk 2 sts, in 3rd st hdc flo, dc 2 flo, hdc flo all in the 3rd stitch* repeat around body, sc in last 2 sts, then sl st to the neck.
Tie off and weave in ends.
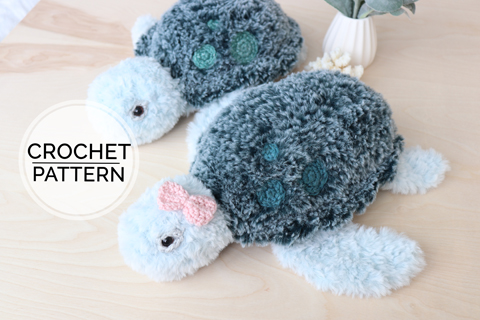
Front Flippers of Sea Turtle
Using color A (faux fur), 10 mm hook:
Insert hook in the 5th st from head, and continues as follows working toward the head, you will work into the back loop only for the first row of the Flipper because the edging is using the front loop only.
Repeat on each side of the turtle:
Row 1: Ch 1, sc in first st, hdc in next st, dc in next st. (3)
Row 2: Ch 2, turn, dc in first st, hdc in next st, sc-inc in last st. (4)
Row 3: Ch 1, turn, sc in first 2 sts, dc2tog in last 2 sts. (3)
Row 4: Ch 2, turn, dc2tog in first 2 sts, sc in last st. (2)
Row 8: Ch 2, turn, dc2tog in remaining 2 sts. (1)
Tie off weave in ends.
Back Flippers
Using color A (faux fur), 10 mm hook:
Insert hook in the 5th st from the center back point of the tail, and continue as follows working toward the head, you will work into the back loop only for the first row of the Flipper as the edging is using the front loop only:
Repeat on each side of the turtle:
Row 1: Ch 1, hdc in first st, dc in next st. (2)
Row 2: Ch 2, turn, dc in first st, hdc in last st. (2)
Rows 3-4: repeat Rows 1-2.
Tie off weave in ends.
Turtle Tail
Using color A, 10 mm hook:
Insert your hook into the the back center “point” of the turtle and continue as follows, you will work into the back loop only for the first row as the edging is using the front loop only:
Row 1: Ch 2, dc2tog. (1)
Tie off and weave in ends.
Crochet Circles Pattern
Using color D and 4.5 mm hook:
Row 1: Make a magic circle, sc 6, sl st to join. (6)
Tie off on circle #1 leaving long tail to sew onto body.
Using color D and 6 mm hook:
Row 1: Make a magic circle, sc 6, sl st to join. (6)
Tie off on circle #2 leaving a long tail to sew onto body.
Using color D and 4.5 mm hook:
Row 1: Make a magic circle, sc 6, sl st to join. (6)
Row 2: Ch 1, sc-inc in each st around, sl st to join. (12)
Tie off on circle #3 leaving a long tail to sew onto body.
Sewing on circles to the Top Shell:
Take a piece of yarn and whip stitch circles onto front right side of top shell.
Crochet Small Bow Pattern
Using color E and 4.5 mm hook:
Row 1: Ch 7, hdc in 2nd ch from hook, and in ea ch across. (6)
Rows 2-4: Ch 1, turn, hdc in ea st across. (6)
Tie off and weave in ends.
Creating and sewing on bow to head:
Take a piece of yarn and wrap around center of bow, and tie a knot. Sew onto head using piece of yarn you cut.
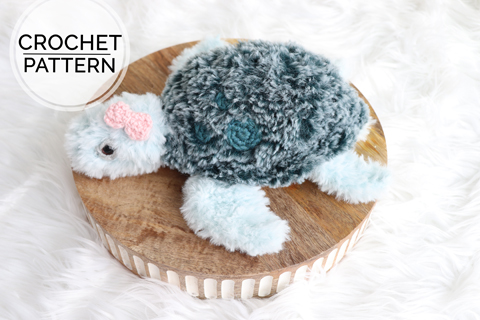
Finishing up the Crochet Mini Turtle Pattern
To stuff the Sea Turtle body, insert the stuffing on the bottom side of the “neck”.
To make the mouth on the Sea Turtle take a piece of yarn and insert the darning needle right below the eye. Then insert on the front of the head splitting the mouth yarn then go to the other side of the head. Weave in ends.
Available Crochet Turtle Patterns for Purchase
Buy the ad-free paid pdf Crochet Bunny Patterns from my Pattern Shop:
XXS Crochet Turtle
XS Crochet Turtle
Small Crochet Turtle
Medium Crochet Turtle
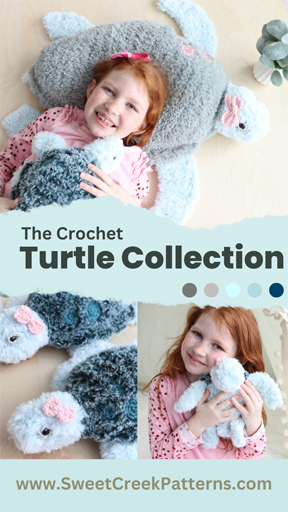
PIN NOW, CROCHET LATER

Is there a right handed free pattern please?
Hi Beverly!
Whether your right handed or left handed the free turtle pattern on this blog post will work perfectly for you. If you desire a right handed YouTube Tutorial for the turtle, you can find it here: https://www.youtube.com/watch?v=jepMkosdu1k&t=1s