Bobble Stitch Round Crochet Pillow- FREE Pattern & Tutorial
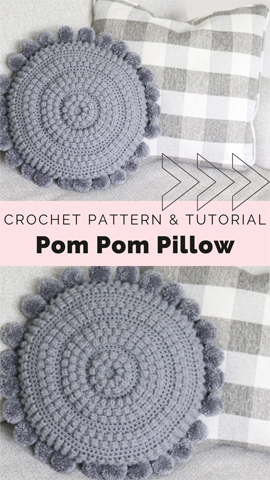
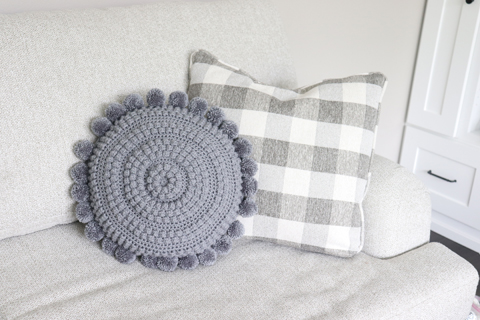
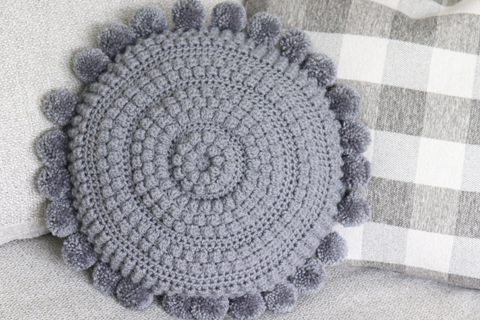
Indulge in the deep textures of this round bobble pillow accented with poms around the outer edge. This Circular Pom Pom Pillow is a perfect piece of decor in any room needing a bold look with a soft feel. Round pillows are trending right now because they add contrast and balance to the many straight lines in a room. The delicate bobbles are worked in the round and establish a profound texture and dimension.
PIN NOW CROCHET LATER
Buy Circular Pom Pom Crochet Pillow ad free pdf pattern here
Round Crochet Pillow Tutorial
Access the LEFT Handed Tutorial here.
Decorating with Pillows
It’s all about the pillows! Decorating with throw pillows is the best way to elevate a house to a home. When it comes to couches, benches, beds, stools, reading nooks, and everywhere in between, adding a throw pillow will add design and purpose. Elevate the intrigue of a room by mixing and matching pillows with different patterns, textures, sizes, and most importantly shapes.
Pillow Styling Tips
For the bed – Style your bed pillows so they create a look and feel that is right for your home. By mixing square and rectangular pillows with curvy round pillows you add contrast and make a room feel more balanced and relaxed. Consider layering your pillows on your bed. When layering pillows try keeping the neutral square pillows in the back and the round more exciting throw pillows in the front.
For living spaces – Pick an odd number of pillows, with differing sizes, shapes and textures, but a unifying aspect, like a color or theme. Arrange the large pillows in the back and the smaller ones in front.
Pillow Customization Tips
Options for the back of the pillow:
You can do a generic back using one color, or you can complete the front panel using a different color that would be accented by the color of poms you choose.
Different crochet edging options:
For this pom pillow we have chosen to design poms around the outside of the pillow, but there are tons of different edges you can crochet to complete the pillow and create a totally unique look. Consider crocheting Faux Fur Balls for the edging.
Materials Needed:
HOOK
5.5 mm • US size I (or hook to obtain gauge)
YARN USED
Premier Basix Worsted Steel, 1920 yards of #4 worsted weight yarn.
*I use affiliate links that I receive a small commission at no cost to the customer.
NOTIONS
Scissors
Stitch marker
Darning needle
16” Round Pillow Form or Poly-fil
Tapestry Needle
24 Zip ties (2.5 mm wide x 6 in long)
Clover Pom Maker (optional)
GAUGE
13 hdc sts by 11 rows = 4” square
6 ends following first 6 rows of back pillow
FINAL SIZE
16″ diameter
Front of Pillow
Rnd 1 (rs): Make a magic circle, hdc 8, sl st. 8 sts
Rnd 2 : Ch 1, 2 hdc in ea st, sl st. 16 sts
Rnd 3 : Ch 1, turn, *bobble, sc, repeat from * to end of rnd, sl st.
Rnd 4 : Ch 1, turn, *2 sc, sc, repeat from * to end of rnd, sl st. 24 sts
Rnd 5 : Ch 1, turn, *bobble, sc, repeat from * to end of rnd, sl st.
Rnd 6 : Ch 1, turn, hdc 1, *2 hdc-inc, hdc 2, repeat from * to last st, hdc 1, sl st. 32 sts
Rnd 7 : Ch 1, *2 hdc-inc, hdc 3, repeat from * to end of rnd, sl st. 40 sts
Rnd 8 : Ch 1, hdc 2, *2 hdc-inc, hdc 4, repeat from* to last 2 sts, hdc 2, sl st. 48 sts
Rnd 9 : Ch 1, turn, *bobble, sc, repeat from * to end of rnd, sl st.
Rnd 10 : Ch 1, turn, *2 sc-inc, sc 5, repeat from * to end of rnd, sl st. 56 sts
Rnd 11 : Ch 1, turn, *bobble, sc, repeat from * to end of rnd, sl st.
Rnd 12 : Ch 1, turn, 3 sc, *2 sc-inc, sc 6, repeat from * to last 3 sts, sc 3, sl st. 64 sts
Rnd 13 : Ch1, turn, *bobble, sc, repeat from * to end of rnd, sl st.
Rnd 14 : Ch 1, turn, *2 hdc-inc, hdc 7, repeat from * to end of rnd, sl st. 72 sts
Rnd 15 : Ch 1, hdc 4, *2 hdc-inc, hdc 8, repeat from * to last 4 sts, hdc 4, sl st. 80 sts
Rnd 16 : Ch 1, *2 hdc-inc, hdc 9, repeat from * to end of rnd, sl st. 88 sts
Rnd 17 : Ch 1, turn, *bobble, sc, repeat from * to end of rnd, sl st.
Rnd 18 : Ch 1, turn, sc 5, *2 sc-inc, sc 10, repeat from * to last 5 sts, sc 5, sl st. 96 sts
Rnd 19 : Ch 1, turn, *bobble, sc, repeat from * to end of rnd, sl st.
Rnd 20 : Ch 1, turn, *2 hdc-inc, hdc 11, repeat from * to end of rnd, sl st. 104 sts
Rnd 21 : Ch 1, hdc 6, *2 hdc-inc, hdc 12, repeat from * to last 6 sts, hdc 6 sl st. 112 sts
Rnd 22 : Ch 1, *2 hdc-inc, hdc 13, repeat from * to end of rnd, sl st. 120 sts
Rnd 23 : Ch 1, turn, *bobble, sc, repeat from * to end of rnd, sl st.
Rnd 24 : Ch 1, turn, sc 7, *2 sc-inc, sc 14, repeat from * to last 7 sts, sc 7, sl st. 128 sts
Rnd 25 : Ch 1, turn, *bobble, sc, repeat from * to end of rnd, sl st.
Rnd 26 : Ch 1, turn, *2 sc-inc, sc 15, repeat from * to end of rnd, sl st. 136 sts
Rnd 27 : Ch 1, turn, *bobble, sc, repeat from * to end of rnd, sl st.
Rnd 28 : Ch 1, turn, hdc 8, *2 hdc-inc, hdc 16, repeat from * to last 8 sts, hdc 8, sl st. 144 sts
Rnd 29 : Ch 1, *2 hdc-inc, hdc 17, repeat from* to end of rnd, sl st. 152 sts
Fasten off, weave in ends.
Back of Pillow
Rnd 1 (rs): Make a magic circle, hdc 8, sl st. 8 sts
Rnd 2: Ch 1, 2 hdc-inc in ea st, sl st. 16 sts
Rnd 3: Ch 1, *2 hdc-inc, hdc, repeat from * to end of rnd, sl st. 24 sts
Rnd 4: Ch 1, hdc 1, *2 hdc-inc, hdc 2, repeat from * to last st, hdc 1, sl st. 32 sts
Rnd 5: Ch 1, *2 hdc-inc, hdc 3, repeat from * to end of rnd, sl st. 40 sts
Rnd 6: Ch 1, hdc 2, *2 hdc-inc, hdc 4, repeat from * to last 2 sts, hdc 2, sl st. 48 sts
Rnd 7: Ch 1, *2 hdc-inc, hdc 5, repeat from * to end of rnd, sl st. 56 sts
Rnd 8: Ch 1, hdc 3, *2 hdc-inc, hdc 6, repeat from * to last 3 sts, hdc 3, sl st. 64 sts
Rnd 9: Ch 1, *2 hdc-inc, hdc 7, repeat from * to end of rnd, sl st. 72 sts
Rnd 10: Ch 1, 4 hdc, *2 hdc-inc, hdc 8, repeat from * to last 4 sts, hdc 4, sl st. 80 sts
Rnd 11: Ch 1, *2 hdc-inc, hdc 9, repeat from * to end of rnd, sl st. 88 sts
Rnd 12: Ch 1, hdc 5, *2 hdc-inc, hdc 10, repeat from * to last 5 sts, hdc 5, sl st. 96 sts
Rnd 13: Ch 1, *2 hdc-inc, hdc 11, repeat from * to end of rnd, sl st. 104 sts
Rnd 14: Ch 1, hdc 6, *2 hdc-inc, hdc 12, repeat from * to last 6 sts, hdc 6, sl st. 112 sts
Rnd 15: Ch 1, *2 hdc-inc, hdc 13, repeat from * to end of rnd, sl st. 120 sts
Rnd 16: Ch 1, hdc 7, *2 hdc-inc, hdc 14, repeat from * to last 7 sts, hdc 7, sl st. 128 sts
Rnd 17: Ch 1, *2 hdc-inc, hdc 15, repeat from * to end of rnd, sl st. 136 sts
Rnd 18: Ch 1, hdc 8, *2 hdc-inc, hdc 16, repeat from * to last 8 sts, hdc 8, sl st. 144 sts
Rnd 19: Ch 1, *2 hdc-inc, hdc 17, repeat from * to end of rnd, sl st. 152 sts
Rnd 20-21: Ch 1, hdc in ea st, sl st.
Fasten off, weave in ends.
Joining front and back of round crochet pillow
With ws of the front and back pillow facing each other, and a 16” round pillow form (or poly-fil) between the two pillow pieces, hdc in ea st around the pillow joining the front and back of the pillow, 152 sts.
How to make pom poms tutorial for round crochet pillow
- Turn a chair over on its top side, so the chair legs are in the air (legs should preferably be thin or narrow).
- Wrap yarn around 2 of the legs, 75 times.
- Place zip tie (2.5mm wide x 6 in long) in the middle of your yarn. With the flat side of the zip tie facing you and on the far side of the yarn, wrap the zip tie around the yarn by threading in the end of the zip tie and pull tight.
- Place the zip ties 2” apart on your yarn.
- Cut the yarn in-between each zip tie. The individual poms should look like this. Continue to tighten the zip ties as you go.
- Cut out two, 1.75” diameter circles of cardboard, and puncture a hole in the middle of your circles.
- Put the zip tie stem through the hole in the center of your first cardboard circle, and place the second cardboard circle on top of the pom to make it like a pom pom sandwich.
- Trim the excess yarn around the cardboard sandwich.
- Take your pom and turn it 90 degrees, so the zip tie is sticking out perpendicular to your sandwich.
- Trim the excess yarn around the cardboard sandwich the other way.
- Take cardboard off and fluff your new pom pom.
Attaching poms to pillow edging
- First tighten your zip tie, then with a wire cutter cut the extra stem off the zip tie.
- Wrap a 10” piece of yarn around the middle of the pom and double knot it over the top of the zip tie so that you have two pieces of 5” yarn hanging from the pom.
- From the back of the pillow, insert your hook under the hdc st that is around the outside edge of your pillow and pull one 5” piece of the yarn from under the hdc st.
- Make a double knot with the two 5” pieces of yarn.
- Snip off the extra yarn so that it blends in with the rest of the pom.
- Attach poms every 6 hdc sts apart around the pillow for a total of 24 pom poms.
Buy Circular Pom Pom Crochet Pillow ad free pdf pattern here
PIN NOW CROCHET LATER


