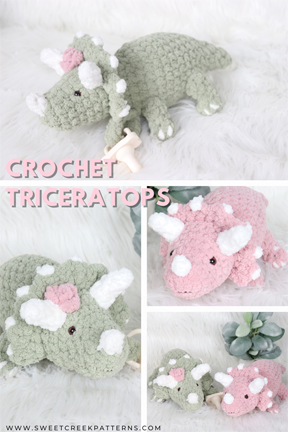
Crochet Triceratops Free Pattern
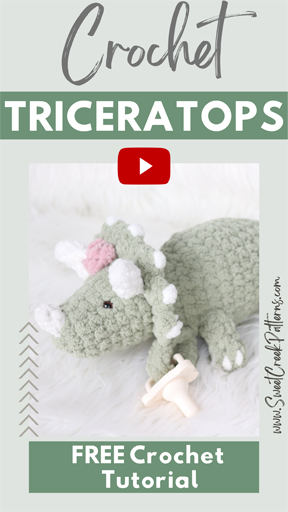
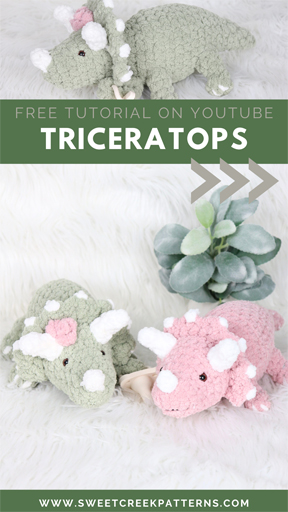
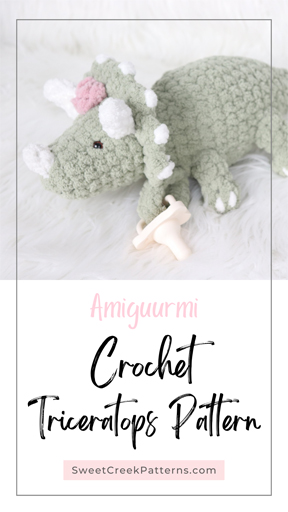
Crochet dinosaur triceratops are one of the most popular crochet amigurumi projects for mamas of little ones, especially boys. This free crochet dinosaur pattern will allow your creative vibes to blossom by experimenting with different yarn colors and textures to personalize your crochet dinosaur. Triceratops have a unique and easily recognizable appearance with their distinctive three facial horns and bony frill at the back of its head. Whether you use pink, blue, green, or gray yarn, your triceratops will be as unique as your personality. Happy crocheting!!!
Buy the ad-free pdf download pattern for the Crochet Triceratops
Buy the Amigurumi Dinosaur Crochet Pattern Bundle
Find the LEFT Handed Crochet Triceratops tutorial here!
Should I use blanket yarn for crochet amigurumi projects?
Using blanket yarn for this crochet dinosaur amigurumi project can offer certain advantages, especially for beginning crocheters. Here are some reasons you may want to consider using blanket yarn for this dinosaur amigurumi project:
- Big Stitches
Blanket yarn has a large weight or size, and when you have a large size yarn then you can see your crochet stitches easier, which is a huge benefit for beginning crocheters. - Soft and Cuddly Texture:
Blanket yarn is often designed to be soft and plush, providing a cozy and cuddly texture for your crochet dinosaurs. This can be especially desirable for amigurumi dinosaur projects meant for little boys to snuggle with. - Quick to Work Up:
Blanket yarn is typically thicker than standard amigurumi yarn, which means that your dinosaur amigurumi projects can work up more quickly. If you’re looking for a fast and satisfying project, blanket yarn can be a good choice, and easy for beginners to work with. - Varied Color Options:
Many blanket yarns come in a variety of colors, allowing you to create vibrant and eye-catching dinosaur amigurumi projects without having to switch yarns frequently. - Fewer Seams:
Due to its thickness, using blanket yarn for crochet projects can result in larger, fewer pieces for your final amigurumi toys. This means you may have fewer seams to sew, which can make the assembly process quicker and simpler. - Warmth and Comfort:
Crocheting with blanket yarn is often associated with warmth and comfort, making it suitable for creating dinosaur amigurumi toys. This can be especially appealing for projects like dinosaur plushies.
While blanket yarn can be a good choice for medium sized dinosaur amigurumi projects, it’s important to note that it might not be suitable for intricate or small-scale designs. The thickness of the yarn may limit the level of detail you can achieve, and the finished product might be larger and heavier than with traditional amigurumi yarn.
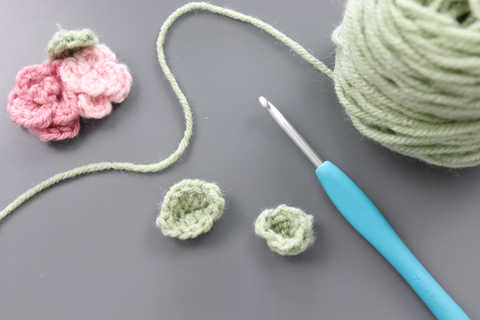
Adding a rose to your Crochet Dinosaur
Adding a crochet flower to a amigurumi dinosaur can be a charming and whimsical embellishment that enhances the overall aesthetic and character of the triceratops. You can choose the color, size, and type of flower to match the personality you envision for your crochet dinosaur. By introducing a different color crochet flower to your crochet dinosaur you can create a pleasing color contrast with the dinosaur’s body and make the overall design more interesting and dynamic.
Ultimately, the decision to add a flower to your crochet dinosaur is a matter of personal preference and creative choice. Feel free to experiment with different flower designs, placements, and sizes to achieve the desired effect and bring your amigurumi creation to life.
Free dinosaur crochet triceratops pattern
MATERIALS
Hooks
4.5 mm
7 mm (or hook to obtain gauge)
Yarn
Color A (Head, body, and legs) #6 Super Bulky • Approx 75 yds
Color B (Horns) #6 Super Bulky • Approx 3 yds
Color C (Rose) #6 Super Bulky • Approx 2 yds
Notions
Scissors, stitch marker, darning needle, poly-fil, 10 mm safety eyes, hot glue to secure safety eyes, and embroidery floss
Gauge
(4″x 4″), 7 mm hook with color A
10 sts x 8 rows sc in ea st
Final Size
6″W x 12″L x 5″H
YARN USED
Head, body, and legs: -Big Twist Plush color: Sage
Horns: -Bernat Blanket Yarn color: White
Rose (optional): -Premier Basix Chenille color: Blush
*I use affiliate links that I receive a small commission at no cost to the customer.
COPYRIGHT: This pattern, including text and photos, is property to Sweet Creek Patterns. I do allow you to sell the finished product from this pattern in small quantities. I would greatly appreciate it if you would credit Sweet Creek Patterns as the designer. Please be respectful of my work and do not modify, sell, or share my patterns.
ABBREVIATIONS
ch chain
sc single crochet
hdc half double crochet
dc double crochet
st stitch
ea each
sp space
sk skip stitch
sl st slip stitch
mc magic circle
inc 2 single crochet in same stitch
hdc-inc 2 half double crochet into stitch
dec single crochet 2 together
hdc-dec half double crochet 2 together
sp space
** repeat instructions inside asterisk
SPECIAL STITCHES
sc2tog
** Insert hook, yarn over pull through,** repeat in next st, yarn over and pull through all 3 loops.
HEAD
Using color A, 7 mm hook:
*Note* You will be working in the round.
Rnd 1: Make a MC and sc 6 into the ring. (6)
Rnd 2: Inc x6. (12)
Rnds 3-4: Sc in ea st (2 rnds) (12)
Rnd 5: Sc 4, inc x4, sc 4. (16)
Rnd 6: Sc in ea st. (16)
Rnd: 7: Sc 4, *inc, sc,* x4, inc, sc 3. (21)
Rnds 8-9: Sc in ea st. (2 rnds) (21)
Rnd 10: *sc, dec,* x7. (14)
*Note* At this point you’ll weave in your tails, and add the eyes on rnd 5, 5 sts apart I use hot glue on the backs for security. Stuff head with poly-fil.
Do NOT tie off, continue to the body.
BODY
Using color A, 7mm hook:
Rnd 1: Sc in ea st. (14)
Rnd 2: Inc x4, sc 10. (18)
Rnd 3: *Inc, sc,* x3, sc 12. (21)
Rnd 4: Sc 14, inc x5, sc 2. (26)
Rnds 5-9: Sc in ea st. (5 rnds) (26)
Rnd 10: Sc 2, dec x5, sc 14. (21)
Rnd 11: Sc in ea st. (21)
*Note* At this point, add stuffing to desired firmness.
Rnd 12: *dec, sc,* x7. (14)
Rnd 13: Sc in ea st. (14)
Rnd 14: *dec, sc,* x2, dec, *hdc, hdc-dec,* x2. (9)
Rnd 15: Sc 4, hdc 5. (9)
*Note* At this point, add stuffing to desired firmness.
Rnd 16: *dec, sc,* x2, hdc-dec, hdc. (6)
Rnds 17-18: Hdc, sc 3, hdc 2. (6)
Rnd 19: Dec x3. (3)
Rnd 20: Dec, sl st. (1)
Tie off and weave in ends
HEAD PLATE
Using color A, 7 mm hook:
You will crochet the plate onto the head on rnd 9, there should be 6 sts across the bottom of head that do NOT have the plate.
Row 1: Attach you hook to the 7th stitch across the bottom of the head, ch 2, dc-inc in first st (same st as the ch 2), then dc in next 13 sts, dc-inc in last st, you should end with only 6 sts apart from bottom of head. (17)
Row 2: Ch 1, turn, (working into dc’s you just created) *sl st in first st, ch 1, dc in next st, ch 1, repeat from* to end of row, sl st in last st.
Tie off, and weave in tails.
WHITE TOPS
Using color B, 7 mm hook:
You will do the following on the top of each “peak”:
Row 1: Ch 1, sl st.
Tie off, and weave in tails.
LEGS
Using color A, 7mm hook:
You are going to make the legs and then attach them to the body.
Back Legs
Rnd 1: Make a MC and sc 8 into ring. (8)
*Note* At this point, weave in your MC tail.
Rnd 2: dec x4. (4)
Rnd 3: Sc in ea st. (4)
Rnd 4: *Sc, inc,* x2. (6)
Rnd 5: Sc in ea st. (6)
On right leg sc 3 after Rnd 5.
Tie off, leaving a long tail to sew leg onto body. STUFF the legs. The front of the back legs goes on Rnd 10, 6 sts apart across the bottom.
Front Legs
Repeat Rnds 1-4 of Back Legs. STUFF the legs. Do the same for Right Leg. The front part of the front leg goes on Rnd 4, 7 sts apart.
BAKC HORNS
Using color A, 4.5mm hook, make 2:
*Note* Leave a long tail on your magic circle as you will make a knot with that at the end of making the horn.
Rnd 1: Make a magic circle, sc 4 into magic circle. (4)
Rnd 2: Do NOT ch 1 as you will begin working in the round, sc-inc in first st, sc in last 3 sts. (5)
Rnds 3-4: Sc in ea st around (2 rnds). (5)
Rnd 5: *Inc, sc* x2, sc in last st. (7)
Rnd 6: Sc in each st around, sl st. (7)
Tie off, leaving long tail to sew onto Head.
Stuff the Horn with poly-fil (making sure to hold the long tail you left on your Magic circle) and once you have stuffed the horn pull the magic circle tail to form a little bit of a curved horn, then make several knots with the long tails. Then whip stitch onto head on Rnd 7 and 8, 4 sts apart.
FRONT HORN
Using color A, 4.5mm hook, make 1:
Follow the first 2 rnds of the Back Horns.
Whip stitch the horn on the center of the head, rnd 2.
TOE NAILS
Using 1 strand color B:
Cut 12″ strand of yarn and and wrap around the center of the of foot, going 1 rnd up, then wrap on each side of the center nail for a total of 3 nails.
MOUTH
(Optional) Using 2 strands of embroidery floss:
Cut 2 (both strands on the darning needle), 12″ strand of embroidery floss, and create a mouth.
Buy the ad-free pdf download pattern for the Crochet Triceratops
Buy the Amigurumi Dinosaur Crochet Pattern Bundle

