Amigurumi Crochet Unicorn Pattern-FREE
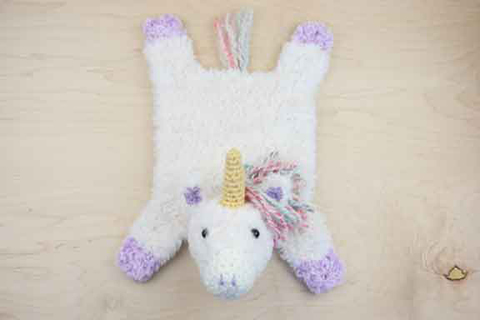
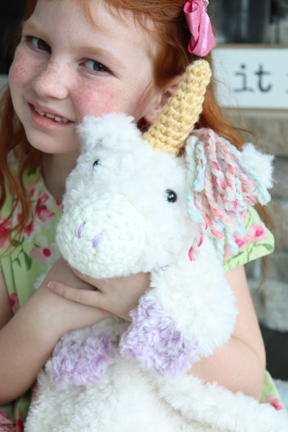
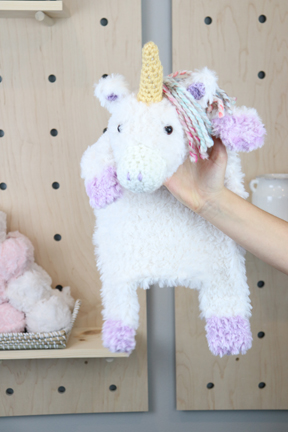
This super soft faux fur amigurumi crochet unicorn pattern would be perfect to create for a baby shower gift or a great addition to any unicorn nursery decor as a fun unicorn lovey. Additionally, it can be an unique milestone photo prop, or tummy time mat. The unicorn is completely crocheted from its head to its back leg which allows for little ones to twiddle their fingers in its holes as they fall asleep.
(As an Amazon Associate this post contains affiliate links, which means I make a small commission at no extra cost to you.)
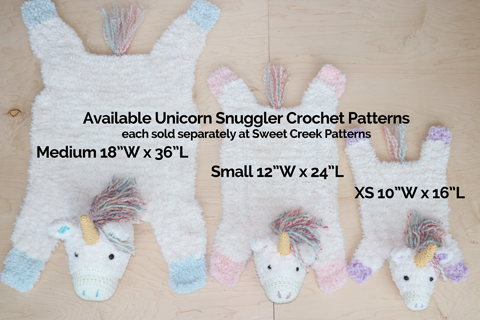
Amigurumi Crochet Unicorn Patterns available in 3 different sizes:
- FREE Extra Small (XS) Amigurumi Crochet Unicorn is given below
- Extra Small (XS) ad-free paid pdf Amigurumi Crochet Unicorn Pattern
- Small ad-free paid pdf Amigurumi Crochet Unicorn Pattern
- Medium ad-free paid pdf Amigurumi Crochet Unicorn Pattern
What kind of yarn is this?
Is it….
faux fur yarn,
fluffy yarn,
fuzzy yarn,
furry yarn,
or fur yarn??????
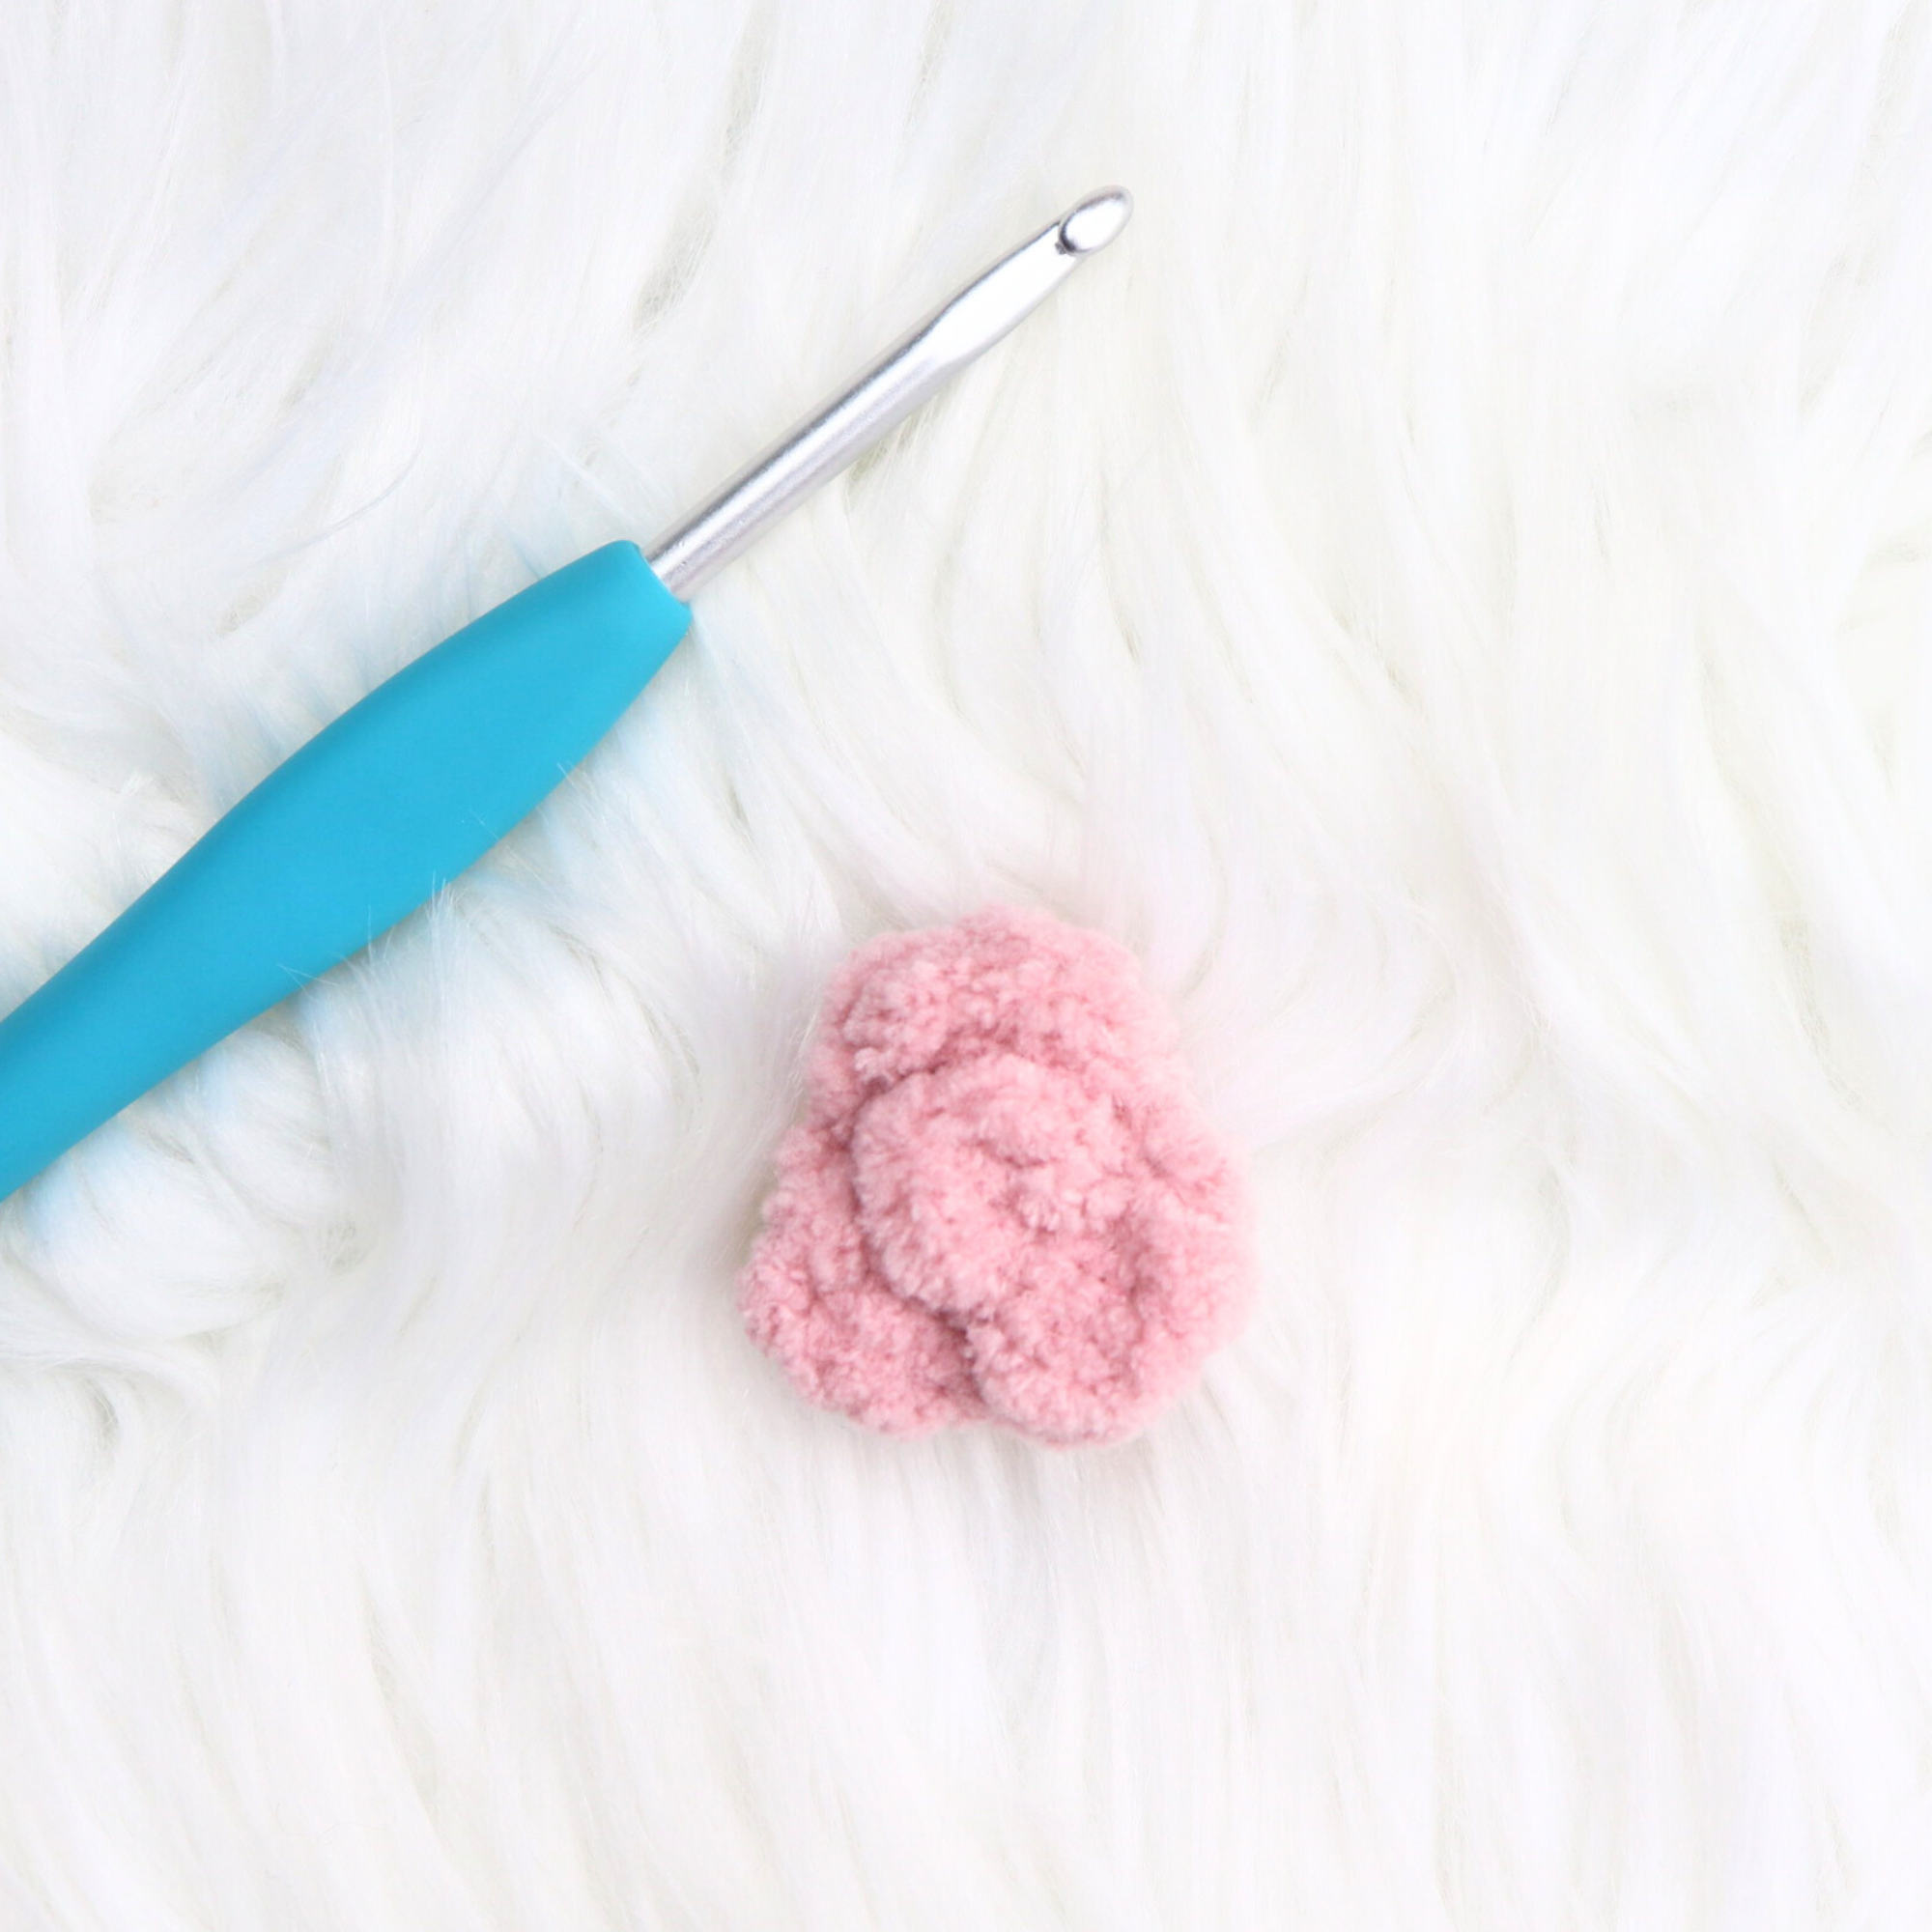
Yes, yes, yes, yes, and YES!!! All these names incorporate the same soft furry features of faux fur yarns. Faux fur yarns fall under the category of novelty yarn. What is novelty yarn? Novelty yarn is any yarn that is not smooth. It is made with unusual structure or fiber composition and varying thickness which produces an uneven surface in the finished fabric.
Features of Faux Fur Yarns
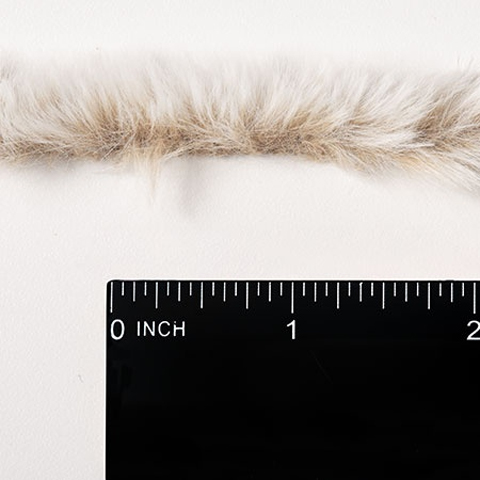
- The yarn is constructed with a thin slice of faux fur fabric as a backing to hold the fur together.
- The furry part of the yarn consists of short hair-like pieces of yarn.
- The nap (or height) of the fur can vary from very short to very long.
- It is easier to feel your crochet stitches rather than look for your stitches.
What are the best faux fur yarns to use for crocheting?
My favorite faux fur yarns, include:
- WeCrochet Fable Fur. Great colors and quality yarn
- Lion Brand Go For Faux: I love the unique colors they have
- Ice Yarns Lambkin creates an amazing shaggy look
- Premier Bunny Yarns the shaggy look of this yarn is over the top!
This is in no way an exhaustive list of the faux fur yarns that are available on the market. In fact, there are several more yarn brands that I would like to try. I’ll keep you updated as to what new yarns I find.
Is it hard to crochet with faux fur yarns?
No, it is not hard to crochet with faux fur yarns when you have the right mindset! You simply need to “picture” your crochet stitches and feel your next stitch. Faux fur yarns are incredibly forgiving, and if you miss a stitch along the way, it normally is hidden and never discovered.
Tips for crocheting with faux fur yarns.
- Picture your stitches
- Feel your stitches
- Use a lot of stitch markers to mark the beginning / end of rows
- Use large hooks
- Use basic crochet stitches
What should I crochet with faux fur yarns?
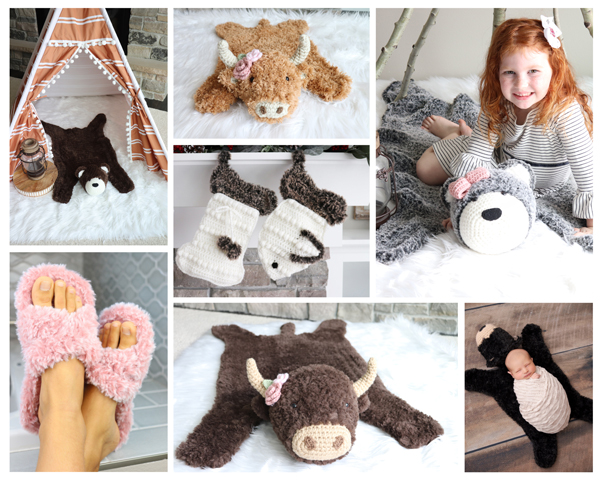
Anything that you crochet with regular yarn, you can crochet with novelty faux fur yarns! I actually believe the most amazing creations are crocheted with Faux Fur Yarn. You can crochet beautiful Faux Fur Amigurumi Crochet, warm and soft Faux Fur Clothing, amazing Faux Fur accessories like headwarmers, blankets, loveys, and so much more. I have several faux fur crochet patterns in my Pattern Shop that I encourage you to try! I would love to see what you create with faux fur yarns, please tag me @sweetcreekpatterns so I can enjoy your creations, too!
What does faux fur yarn feel like?
I have learned that faux fur yarns feel different depending on their composition and how they are made.
- Polyester Faux Fur Yarns like: WeCrochet Fable Fur, Lion Brand Go For Faux, and Ice Yarns Lambkin tend to have a softer feel and shorter nap.
- Microfiber Faux Fur Yarns like Premier Bunny Yarns have a longer nap, more shaggy look, and a little less softness (in my opinion).
What is my experience with faux fur yarns?
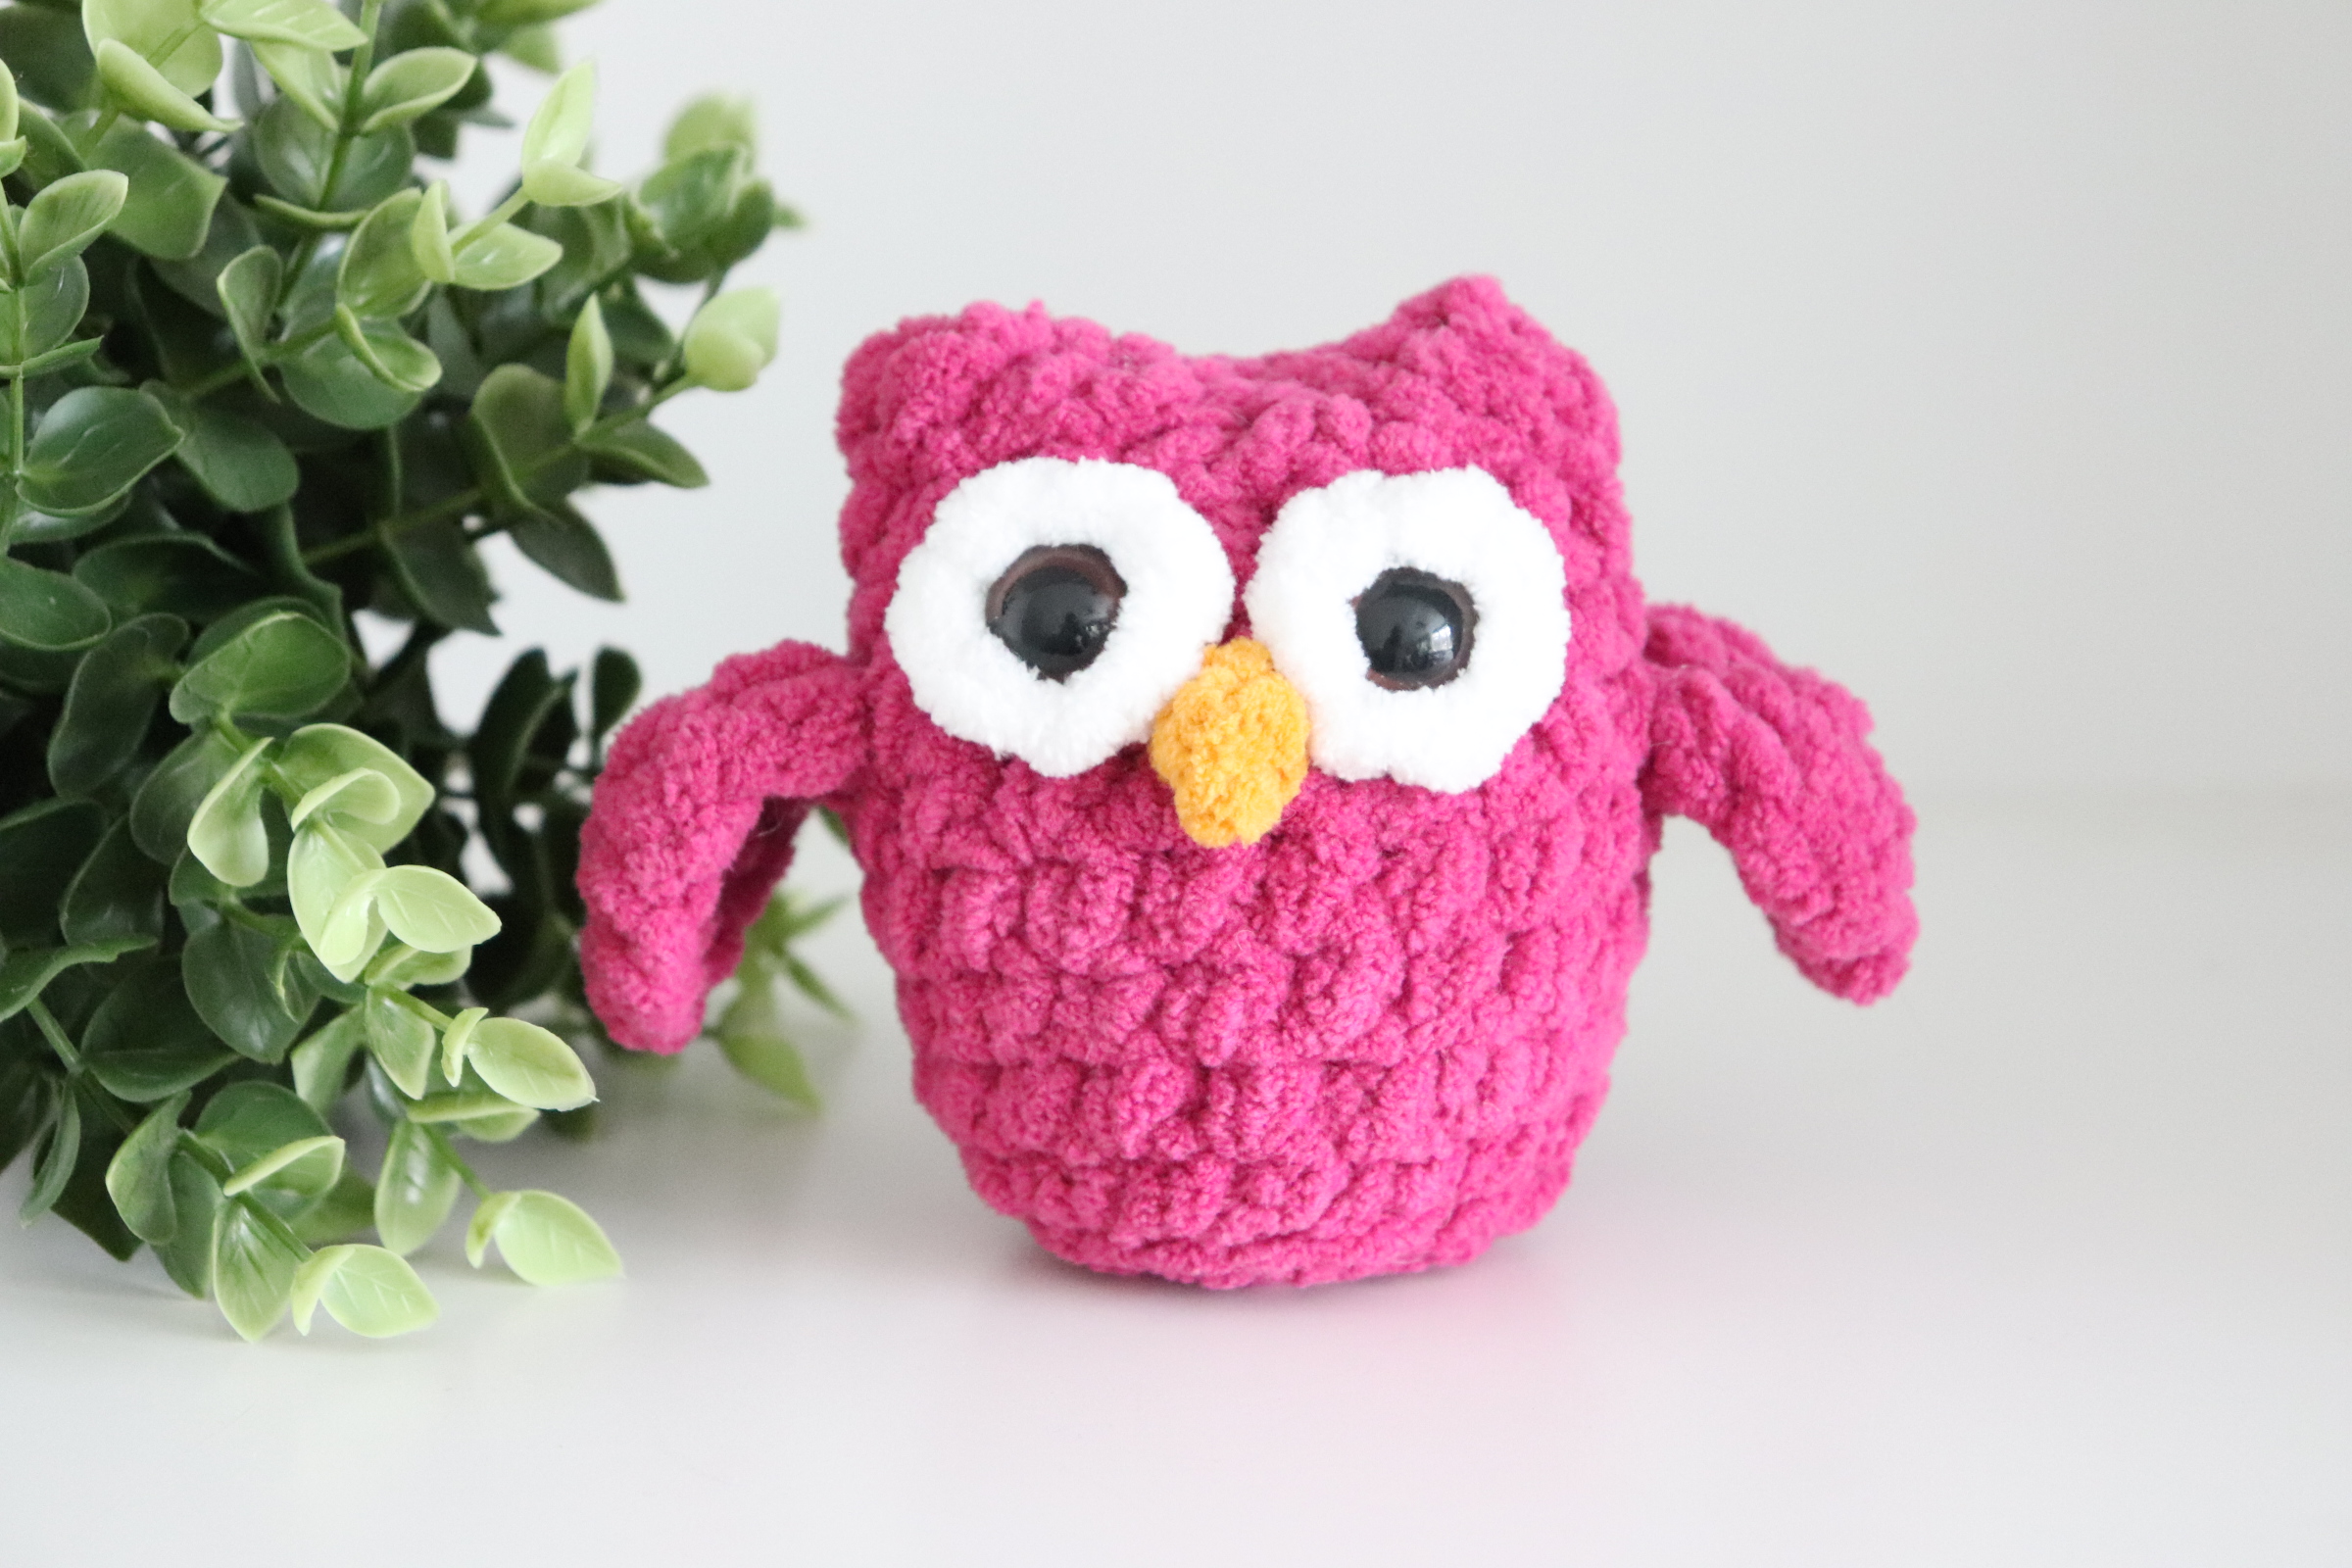
Faux fur yarns are my absolute favorite yarns to crochet with. I wanted to take the opportunity to share some of my creations with you, and allow you to experience the joy of crocheting with faux fur yarns!
Trendy and Timeless Unicorn Nursery / Bedroom decor
We all want the cutest and most trendy nursery and bedroom decor for our kids. The great thing about Unicorn Decor is that it is both trending right now, and it is also timeless.
Faux Fur Amigurumi Unicorn Crochet Pattern- XS Size
MATERIALS
HOOK
4.5 mm • US size 7
6 mm • US size J
10 mm • US size N/P (or hook to obtain gauge)
YARN
Color A (Muzzle yarn)
#4 Worsted Weight • Approx 50 yds used
Color B (faux fur yarn for Body and Outer Ears)
#6 Super Bulky • Approx 100 yds used
Color C (faux fur yarn for Hoof)
#6 Super Bulky • Approx 20 yds used
Color D (yarn for Nostrils, and Inner Ears)
#4 Worsted Weight • Approx 10 yds used
Color E (Horn yarn)
#4 Worsted Weight • Approx 20 yds used
Color F (Mane and Tail yarn)
#6 Super Bulky • Approx 20 yds used
NOTIONS
Scissors
Stitch markers
Darning needle
Poly-fil
14 mm safety eyes
Hot glue to secure safety eyes
GAUGE (4″x 4″), 10 mm hook with Faux Fur
8 sts x 8 rows sc in ea st
FINAL SIZE
10″W x 16″L
YARN USED
For the muzzle and horn, I used 2 strands of Red Heart Super Saver yarn, which is a #4 worsted weight yarn in the color Soft White and Cornstarch.
For the body, I used WeCrochet’s Fable Fur in the color Eisbar, and for the hoof, I used Paloma, and Topo. I also used Lion Brand Go For Faux in the color Lavender.
For the nostrils and inner ears, I used 1 strand of Red Heart Super Saver yarn, which is a #4 worsted weight yarn.
For the mane and tail, I used Lion Brand Thick and Quick in the color Carousel.
ABBREVIATIONS
ch chain
sc single crochet
dc double crochet
st stitch
sk skip
sl st slip stitch
mc magic circle
inc increase
hdc-inc 2 half double crochet increase
3hdc-inc 3 half double crochet increases
sc-inc 2 single crochet increase
dc2tog double crochet 2 together
sp space
dc2tog **Yarn over insert, yarn over pull through, yarn over pull through 2 loops** repeat 2 times.
MUZZLE
Using TWO strands of color A and 6 mm hook:
Note: For the whole pattern ALL turning chains do NOT count as a stitch.
Rnd 1: Make a magic circle, ch 1, hdc 8 into magic circle, sl st to join. (8)
Rnd 2: Do NOT ch 1, (your going to start working in the round) hdc-inc in ea st. (16)
Rnds 3-4: Hdc in ea st around. (16)
Rnd 5: Hdc in first 7 sts, hdc-inc in next 2 sts, hdc in last 7 sts. (18)
Rnd 6: *Ch 1, sk 1, sc in next st, repeat from* to first ch 1 sp. (9 ch 1 sps)
Tie off.
HEAD
Using one strand of color B (faux fur), 10 mm hook:
Please Note: I use a Stitch Marker so that I know where the row ends and also to mark where the different stitches begin/end.
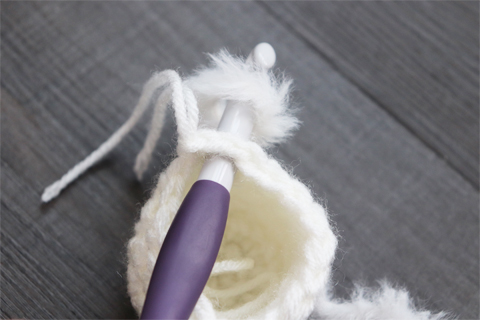
To begin, add faux fur to the last ch 1 sp you created (see picture), and ch 1.
Rnd 1: Sc in first 3 ch-sps, sc-inc in next 3 ch-sps, sc in last 3 ch-sps, sl st to join. (12)
Rnd 2: Ch 1, sc in ea st around, sl st to join. (12)
Rnd 3: Ch 1, sc in first 3 sts, sc-inc in next 6 sts, sc in last 3 sts, sl st to join. (18)
Rnds 4-8: Ch 1, sc in ea st around, sl st to join. (18)
Rnd 9: Ch 1, sc in first 5 sts, sc2tog in next 8 sts (4 times), sc in next 5 sts, sl st to join. (14)
Rnd 10: Ch 1, sc in first 5 sts, sc2tog in next 4 sts (2 times), sc in last 5 sts, sl st to join. (12)
Tie off and weave in ends!
ATTACH (14 mm) safety eyes to completed head (I also recommend hot gluing the eyes on the inside of the head for extra security).
STUFF Head with poly-fil.
BODY
Using one strand of color B (faux fur), 10 mm hook:
The Unicorn Body will connect to the Head and close off the opening in the back of the head, so it is important that you have everything done with the Head, including: safety eyes attached, and stuffing inside of Unicorn Head.
Pinching the top and bottom of the back of the head together, continue as follows:
Row 1: Ch 2, insert hook into Head, sc 7 sts across head, then ch 2. (11)
Row 2: Ch 1, turn, sc-inc in 2nd ch from hook, sc in next 9 sts, sc-inc in last st. (13)
Row 3: Ch 1, turn, sc-inc in first st, sc in next 11 sts, sc-inc in last st. (15)
Row 4: Ch 1, turn, sc-inc in first st, sc in next 13 sts, sc-inc in last st. (17)
Row 5: Ch 1, turn, sc-inc in first st, sc in next 15 sts, sc-inc in last st. (19)
*Note: add a stitch marker on both sides of the last increase row, you will NEED them later*
Rows 6-21: Ch 1, turn, sc in ea st across. (19)
Do NOT tie off, continue on next page.
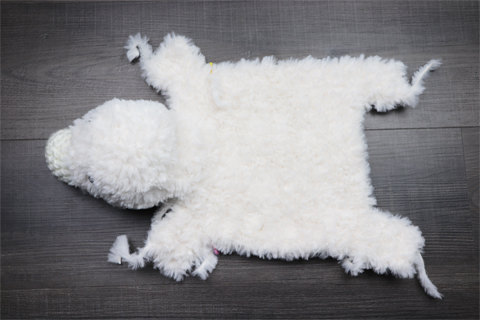
LEGS
Using one strand of color B (faux fur), 10 mm hook:
Leg #1
Rows 22-26: Ch 1, turn, sc in first 4 sts. (4)
Tie off and weave in ends.
Leg #2
Insert your hook in the corner opposite of Leg #1, then yarn over and pull the yarn through.
Row 1: Ch 1, sc in first 4 sts. (4)
Rows 2-5: Ch 1, turn, sc in first 4 sts. (4)
Tie off and weave in ends.
Legs #3-4
Insert your hook (where your stitch marker is) in the corner, by the head of the last increase row, then yarn over and pull the yarn through.
Row 1: Ch 1, sc in first 4 sts. (4)
Rows 2-5: Ch 1, turn, sc in first 4 sts. (4)
Tie off and weave in ends.
EDGING
Using one strand of color B (faux fur), 10 mm hook:
Rnd 1: Sc in each stitch/row of the unicorn body starting at the neck and going to the corner of the leg, in the corner of each leg, sc-inc.
Tie off and weave in ends.
HOOF
Using one strand of color C (faux fur), 10 mm hook, repeat 4 times:
Insert hook in the inner corner of each leg, and continue as follows:
Row 1: Ch 2, dc in next 4 sts. (4)
Row 2: Ch 2, dc2tog in first 2 sts, dc in last st. (3)
Tie off and weave in ends
EARS
Outer Ears
Using one strand of color B (faux fur) and 6 mm hook, make 2:
Row 1: Ch 2, hdc in 2nd ch from hook. (1)
Row 2: Ch 1, turn, 3hdc-inc in first st. (3)
Rows 3-5: Ch 1, hdc in ea st across. (3)
Row 6: Ch 1, hdc3tog in remaining 3 sts. (1)
Tie off, leaving long tail to sew onto Head.
Inner Ears
Using one strand of color D and 4.5 mm hook, make 2:
Do the same as Outer Ears, leaving long tail to whip stitch ears together.
Attaching Inner Ear to Outer Ear:
Place the Inner Ear inside of the Outer Ear, rights sides facing forward and whip stitch the two ears together around the edge. Once done whip stitching the inner and outer ear together, pinch the base of the ears together to make the base thick and sturdy, so once it’s attached to head it will be very secure.
Attaching Ears to Head:
Place the Ears on the Head where desired and whip stitch ears onto the Head.
HORN
Using 2 strands of color E and 6 mm hook:
Rnd 1: Make a magic circle, ch 1, sc 4 into magic circle, sl st to join. (4)
Rnd 2: Do NOT ch 1 as you will begin working in the round, sc-inc in first st, sc in last 3 sts. (5)
Rnds 3-4: Sc in ea st around. (5)
Rnd 5: Sc-inc in first st, sc in next st, sc-inc in next st, sc in last 2 sts. (7)
Rnds 6-10: Sc in each st around. (7)
Rnd 11: *Sc-inc in first st, sc in next sts, repeat from* 3 times, sc in last st. (10)
Tie off, leaving long tail to sew on to Head. Stuff the Horn with poly-fil and whip stitch onto head.
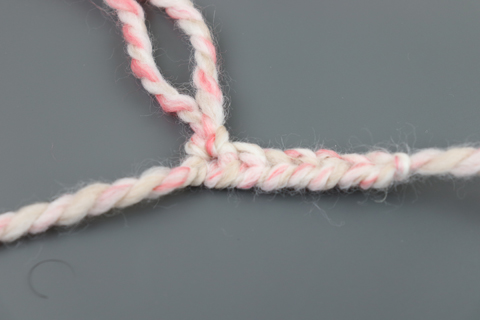
MANE
Using 1 strand of color F and 6 mm hook, make 2:
Row 1: Ch 7, tie off leaving long tail to sew onto head.
Attach hair to chain:
Cut 7, 12″ lengths of yarn, then insert hook into one of the seven chains, and fold the yarn in half over the hook, yo and pull the 2 strands of yarn through. Repeat for all 7 strands. Whip stitch both mane strands diagonally onto back of the head, starting at the horn and going down to the neck.
NOSTRIL
Using one strand of color D and darning needle, repeat twice:
To make the nostril on the 2nd row up from the center, and 3 stitches apart, wrap the yarn around the stitch approximately 3 times.
TAIL
Using one strand color F and 10 mm hook:
Attaching tail to body:
Cut 3, 12″ lengths of yarn, then insert hook into the middle stitch between the back legs, and folding the yarn in half, yo and pull the 3 strands of yarn through at one time, and tighten. Pull the yarn strands apart to make a fine tail look.
PLEASE SHARE WITH ME YOUR CREATIONS by tagging me @sweetcreekpatterns
COPYRIGHT: This pattern, including text and photos is copyright to Sweet Creek Patterns. I do allow you to sell the finished product from this pattern in small quantities. I would greatly appreciate it if you would credit Sweet Creek Patterns as the designer. Please be respectful of my work and do not modify, sell, or share my patterns.
Amigurumi Crochet Unicorn Patterns available in 3 different sizes:
- FREE Extra Small (XS) Amigurumi Crochet Unicorn is given below
- Extra Small (XS) ad-free paid pdf Amigurumi Crochet Unicorn Pattern
- Small ad-free paid pdf Amigurumi Crochet Unicorn Pattern
- Medium ad-free paid pdf Amigurumi Crochet Unicorn Pattern

