How to join granny squares: 7 simple ways
Have you ever wondered how to join crochet squares? You can use various granny join methods for any granny square pattern to create an unique crochet seam for your project. There are several join as you go methods, or watch a pile of individual crochet squares transform into a larger granny square blanket giving you a great sense of accomplishment! Join me as I demonstrate for you, 7 different joining squares techniques. These techniques are fast and easy, and great for a beginner crochet join.
7 Crochet Stitch Joins to use for all Granny Square Patterns:
- Whip Stitch Join
- Back Loop Only (BLO) Whip Stitch Join
- Mattress Stitch
- Back Loop Only (BLO) Mattress Stitch
- Slip Stitch Join Back Loop Only (BLO)
- Single Crochet Front
- Single Crochet Back
Joining Granny Squares Video Tutorial:
LEFT Handed Joining Granny Squares Video Tutorial
Other Granny Squares Techniques from Sweet Creek Patterns
Blocking Granny Squares Blogpost
The Wildflower Granny Square Blanket Blogpost
The Wildflower Granny Square Blanket Pattern
The Wildflower Granny Square Blanket Tutorial
How to Whip Stitch the Granny Squares together:
This technique is simple and elegant.
How to join your Granny Squares using the:
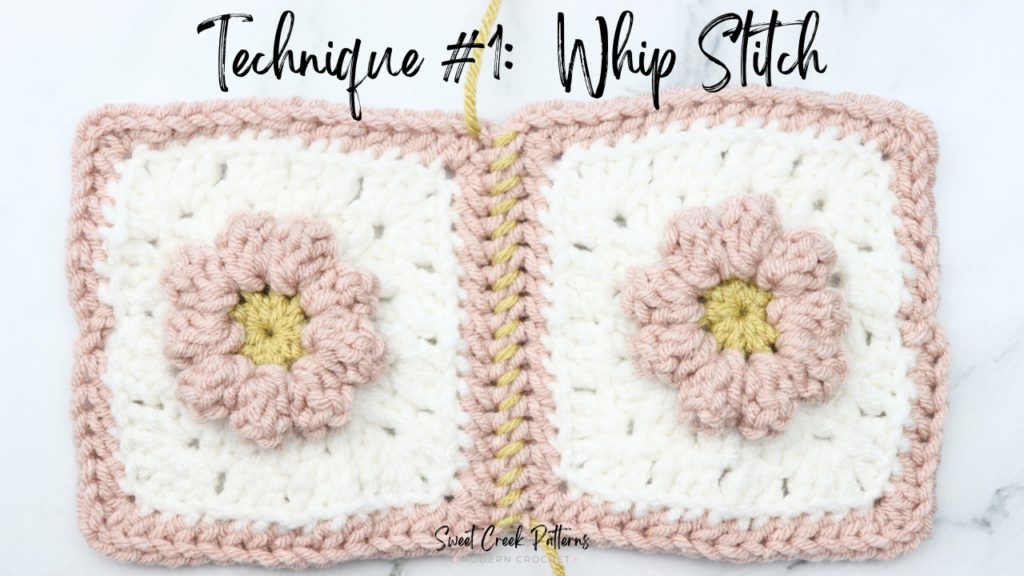
Whip Stitch
Start by inserting your needle through BOTH loop of the corner chain on your first square.
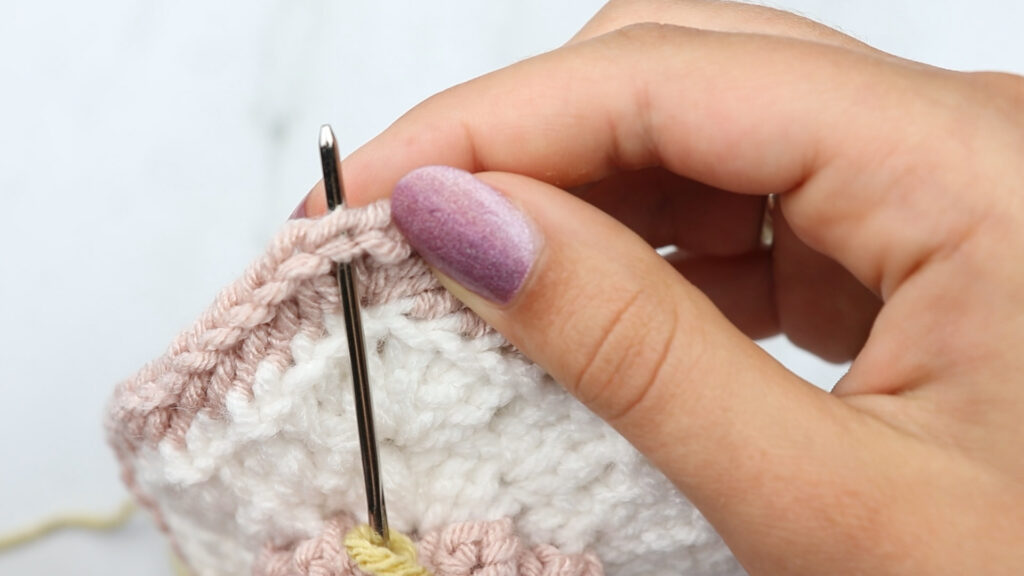
Then grab your second square and insert your needle into both loops as well.
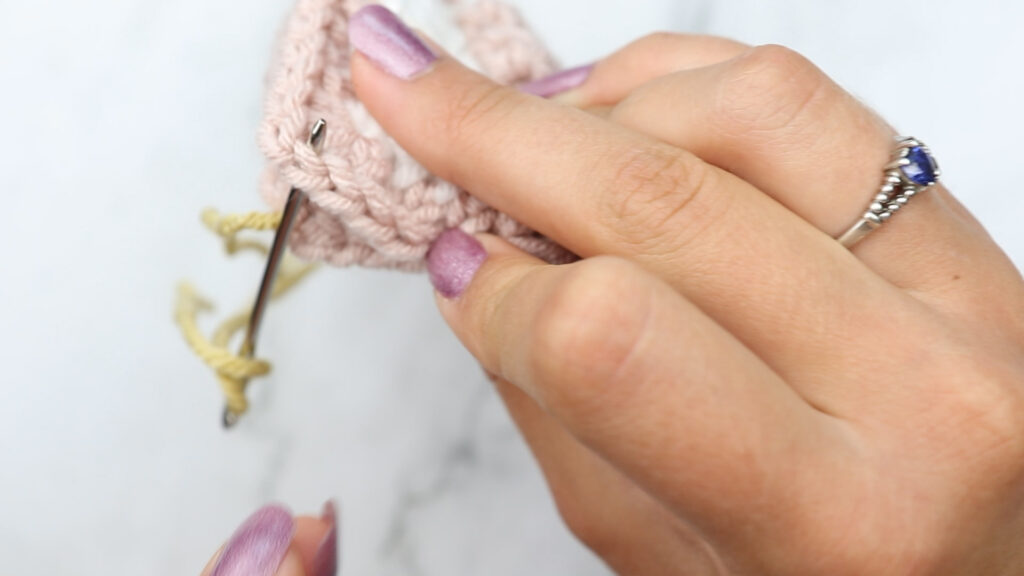
Pull yarn yarn through leaving a long enough tail to weave in the end.
Now, you will go back to the first square and insert your needle into the top loops of the first and second square.
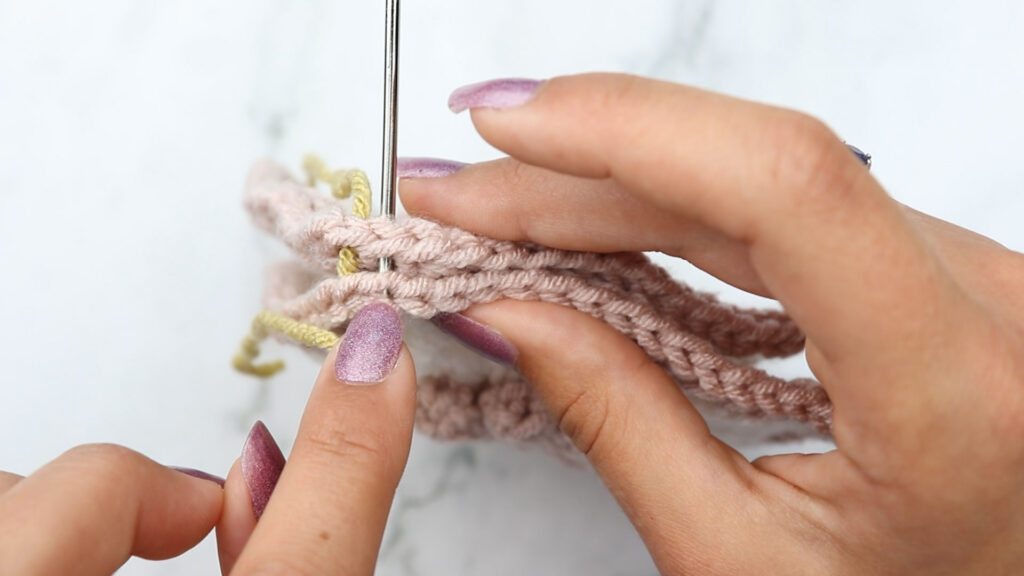
At this point you will just repeat. *Go through both loops on the first square, then go through both loops on the second square, and pull through and repeat*
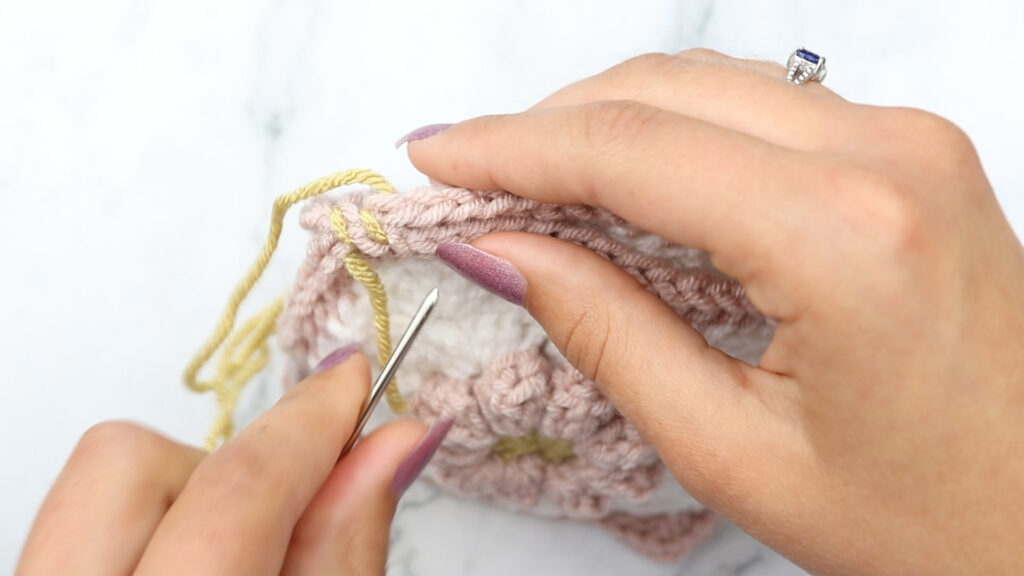
This is how it should look, of course I would recommend using a matching color, I am just using this color for picture purposes. You will repeat the above steps until you have joined the square.
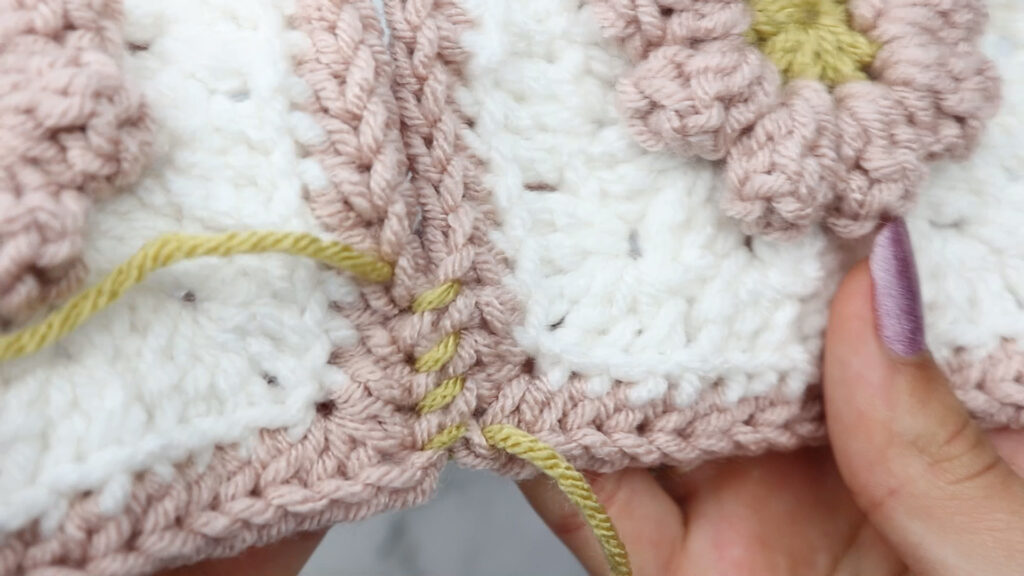
This is how it should look once completed.
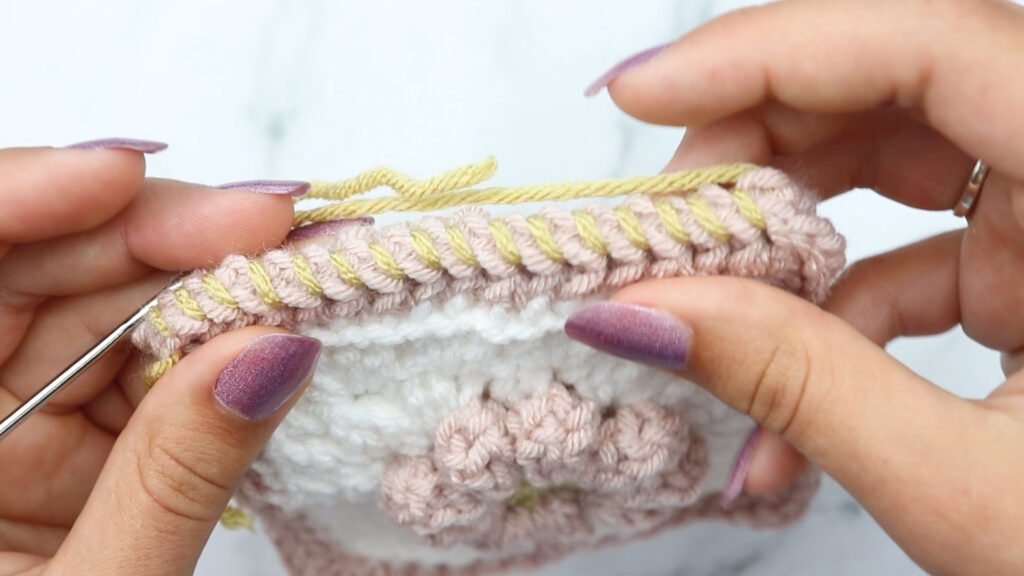
How to Join Granny Squares by Whip Stitch in the Back Loop Only:
This is one of m favorites!
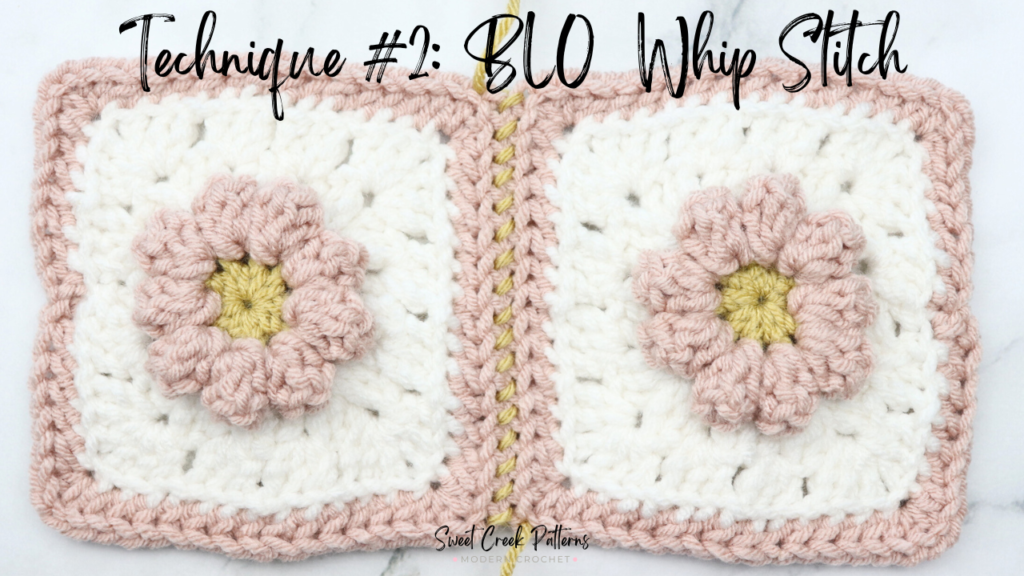
How to join your Granny Squares using the:
Back Loop Only Whip Stitch
You will repeat the same instructions as the Whip Stitch. Just make sure to work in the BACK LOOP ONLY.
So, you can see ere that I am inserting my needle through the back loop only of the first square, and then through what *looks* like the front loop only, but it is not. You should have the right sides facing out, so that means it will look like the front loop only but it is actually the back loop only when you lay the squares flat.
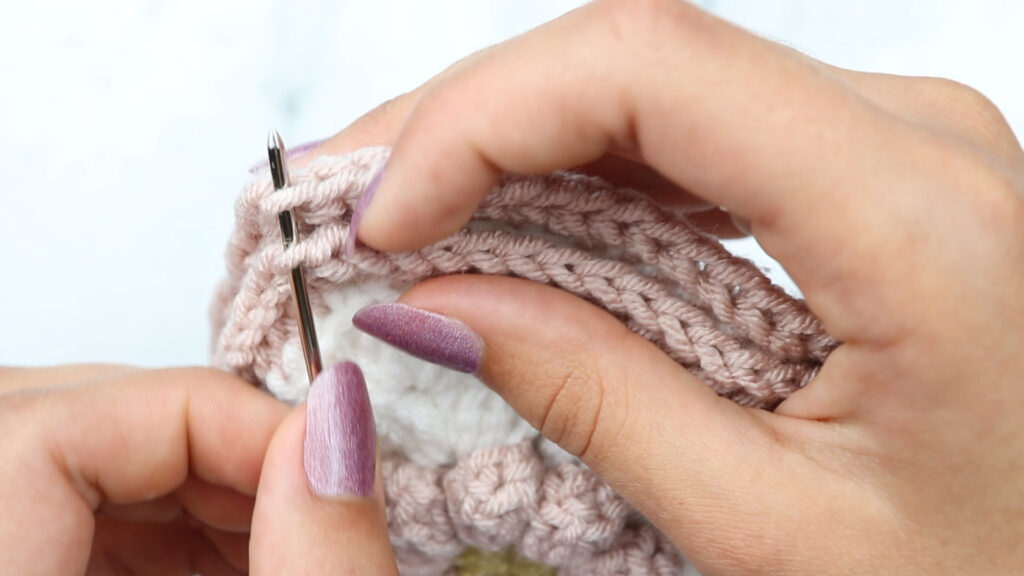
Now you will repeat *go through the BLO of the first square, then go through the BLO of the second, and pull the yarn through, repeat from*
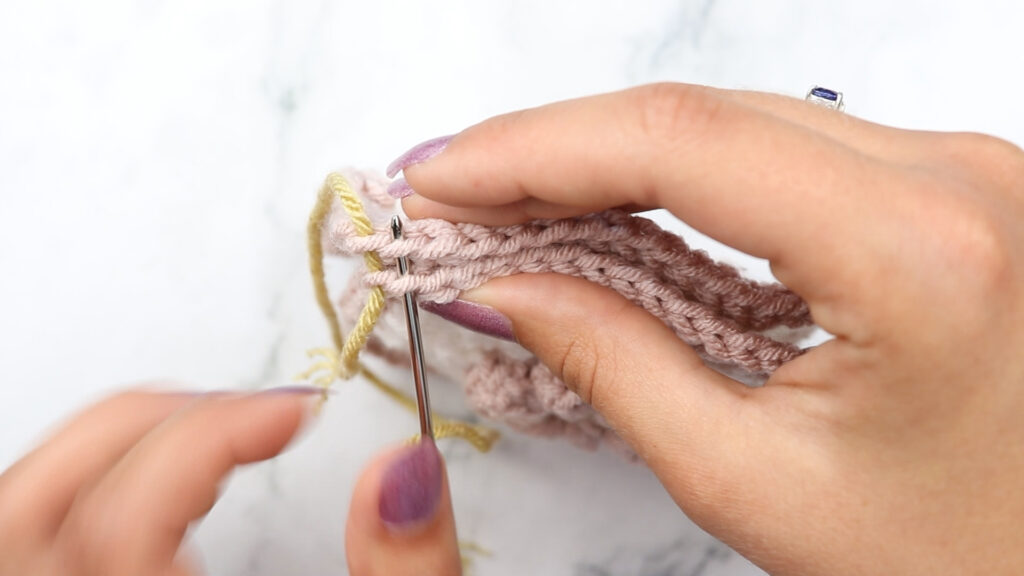
This is how the back loop only whip stitch looks once complete, again it is one of my faves!
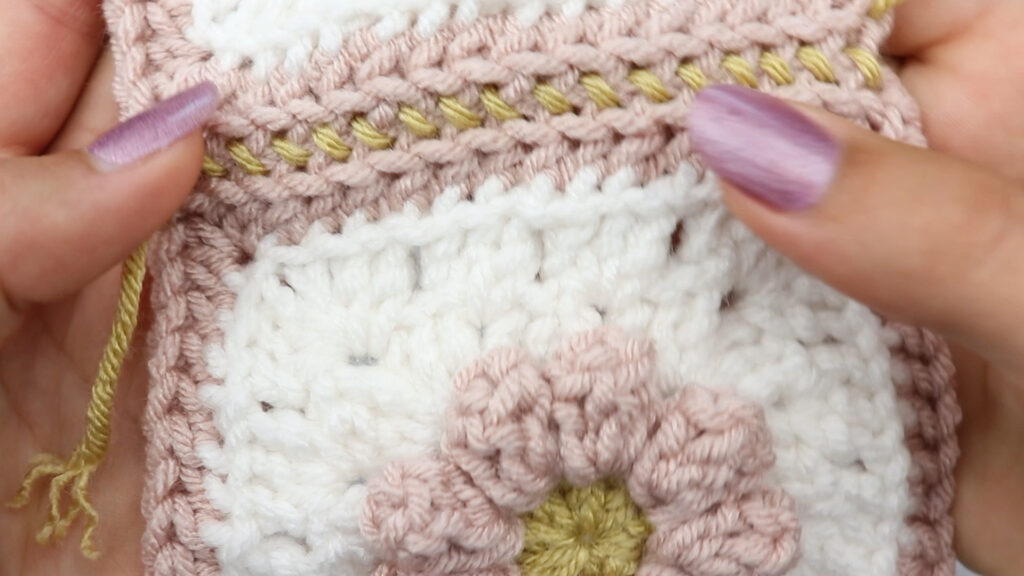
How to join Granny Squares with the Mattress Stitch:
This is another beautiful way to join granny squares!
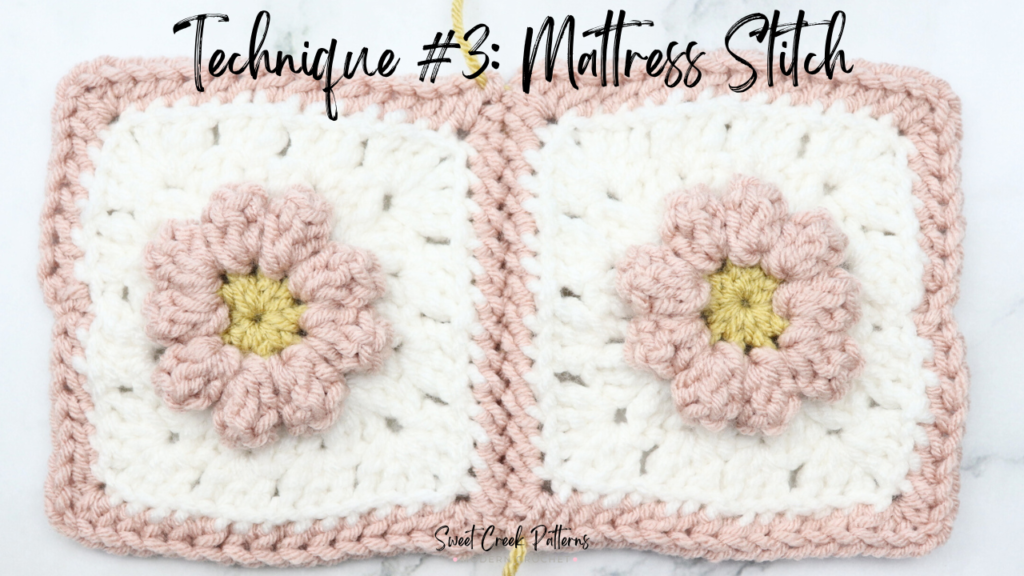
How to join your Granny Squares using the:
Mattress Stitch Crochet
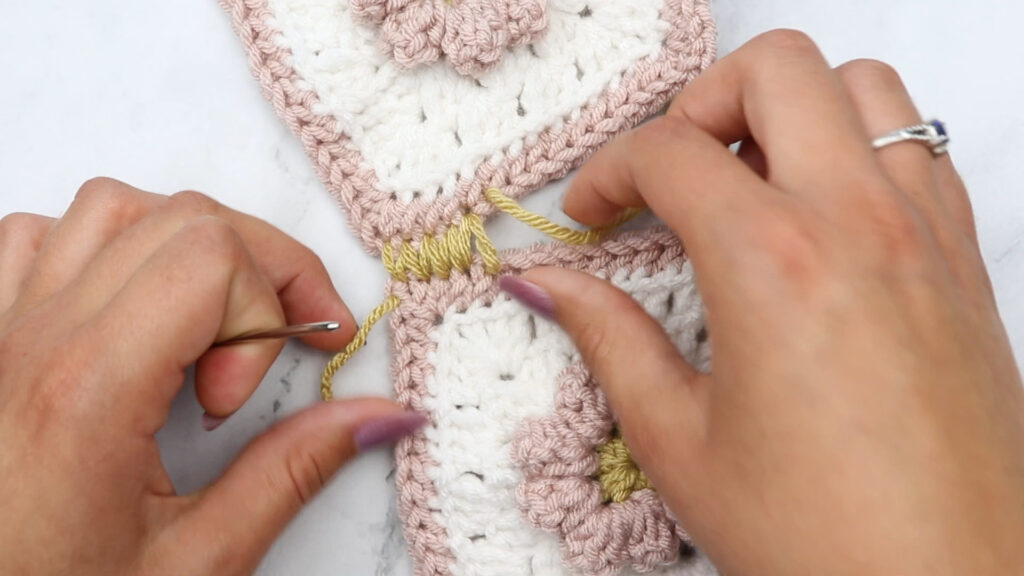
Start by inserting your needle through both loops of your corner stitch (in my case a chain) and then turn your needle and go through both loops of the next stitch (as seen in the picture below):
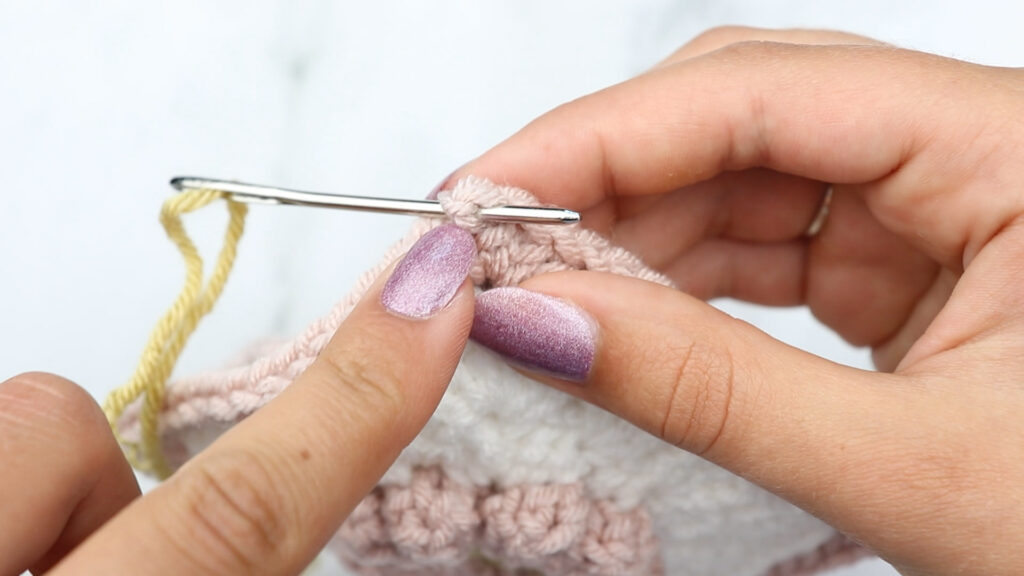
Now you are going to do the exact same thing on the 2nd square (however, because you have the right sides facing out on both your squares it will not look like you are doing the same thing). Just remember that when you are working on the other square so it doesn’t get confusing.
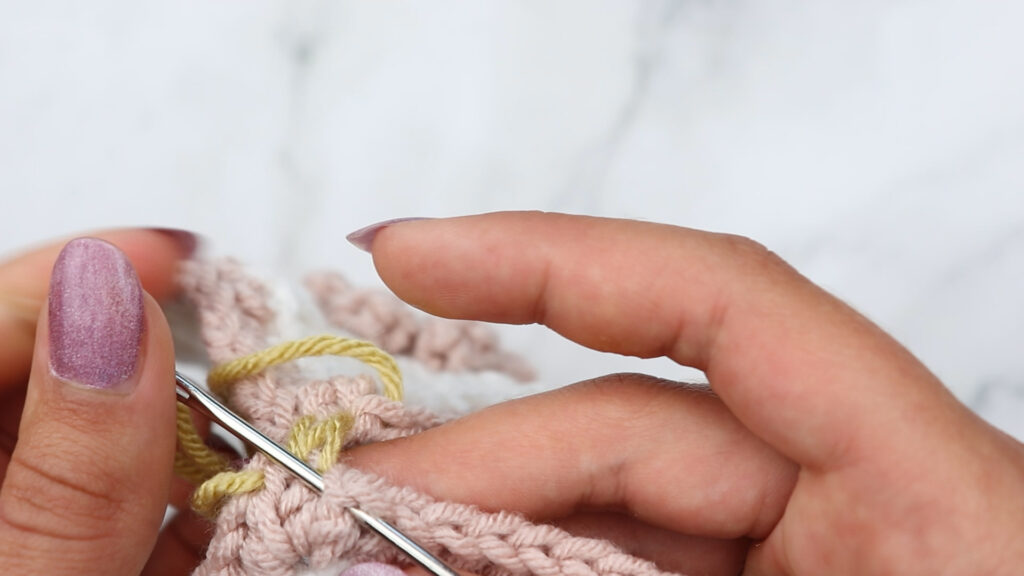
Repeat instructions above. *From the right side of your square you will insert your darning needle through both loops of the st you had gone into before (see below pic), then turn your needle and coming from the back go through the next stitch, do the same thing on the 2nd square and pull your yarn through, repeat from*
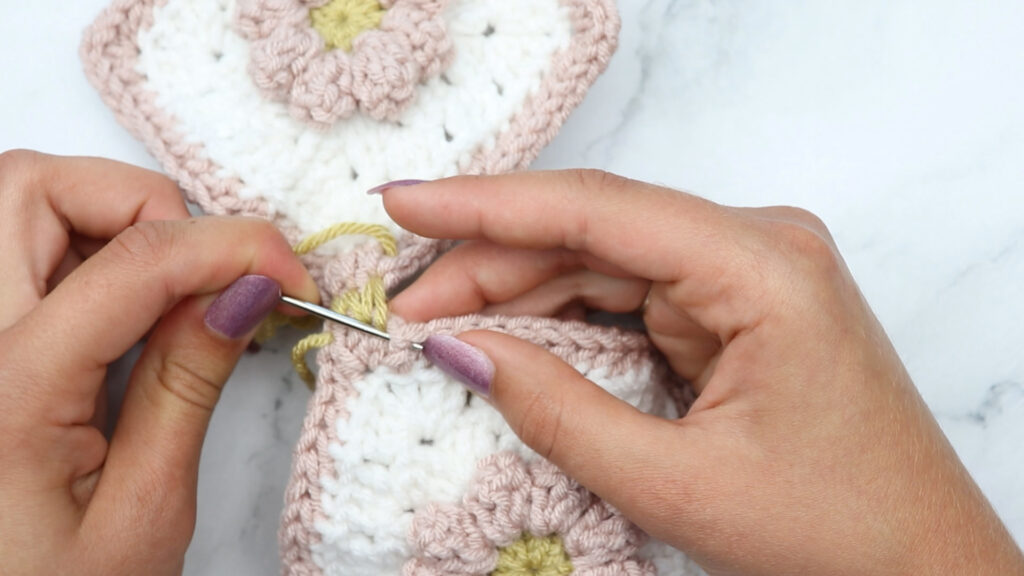
Once you have completed 5-7 sts you will pull on each side of the yarn to tighten.
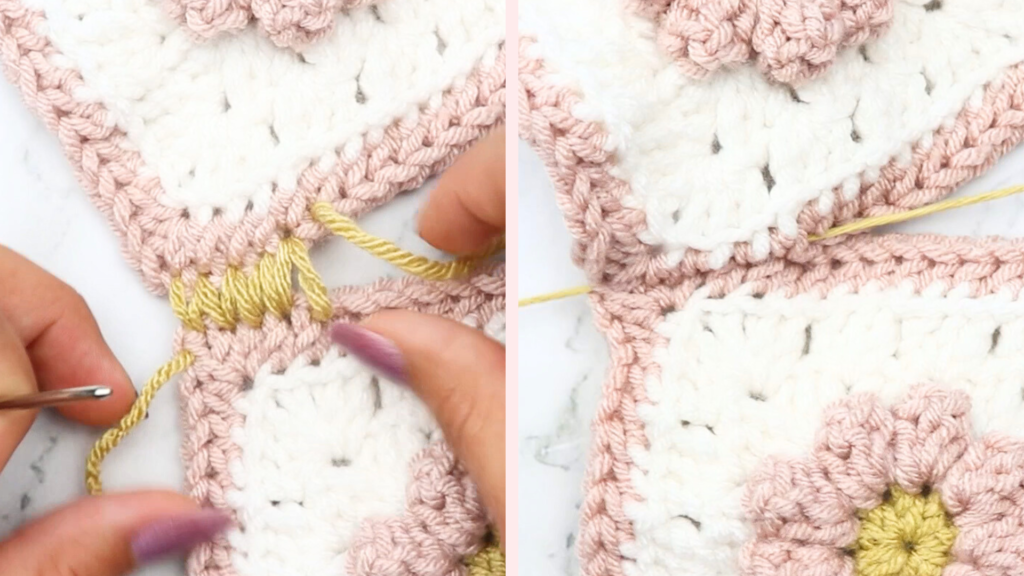
This is how it should look, and you will just continue along until you have finished joining the granny square.
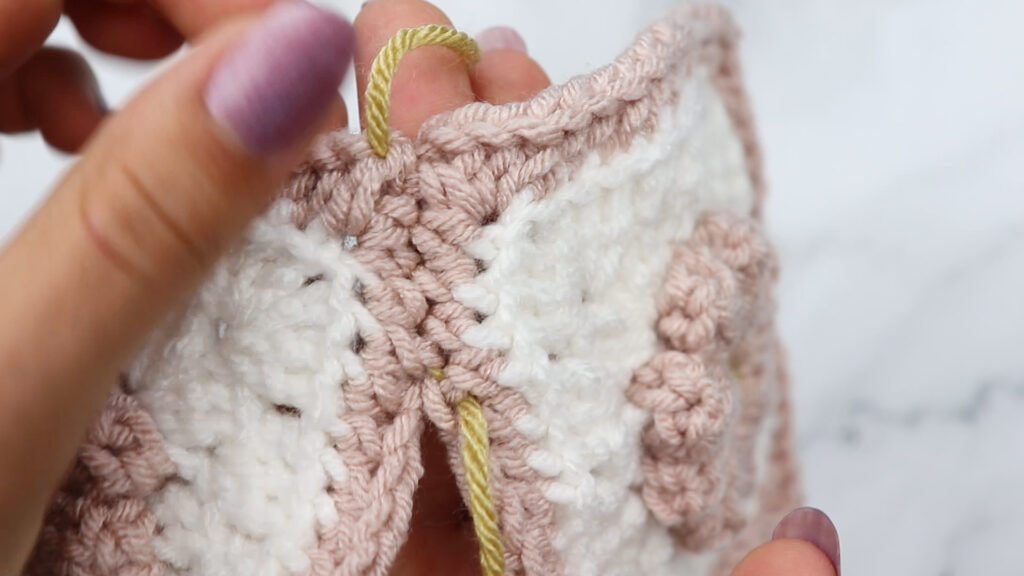
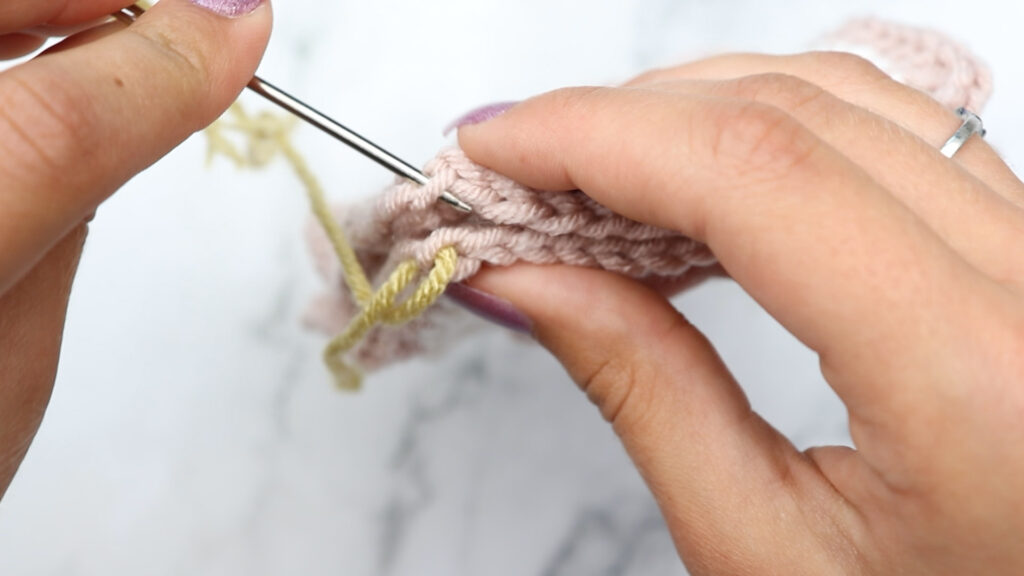
This is how the back side will look, there will be a ridge.
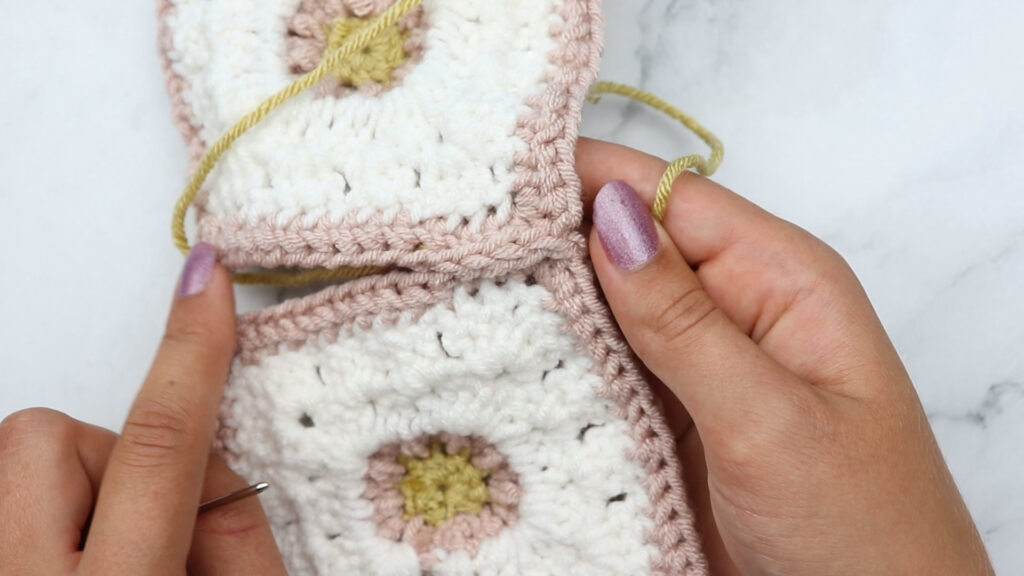
Joining Granny Squares using the Back Loop Only Mattress Stitch:
This is my all time FAVORITE joining method! I used this method on both of my blanket and it was easy and effective!
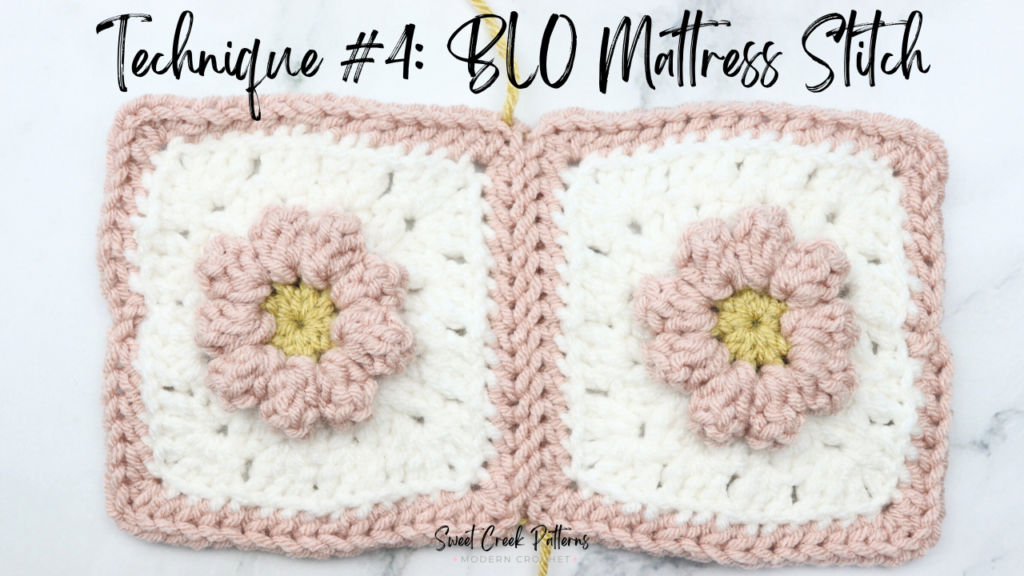
How to join your Granny Squares using the:
Back Loop Only Mattress Stitch
You will basically repeat everything that you did for the Mattress Stitch join but this time you are working in the back loop only.
Start by inserting your needle through the back loop only of your corner stitch (in my case a chain) and then turn your needle and go through the back loop only of the next stitch. (as seen in the picture below):
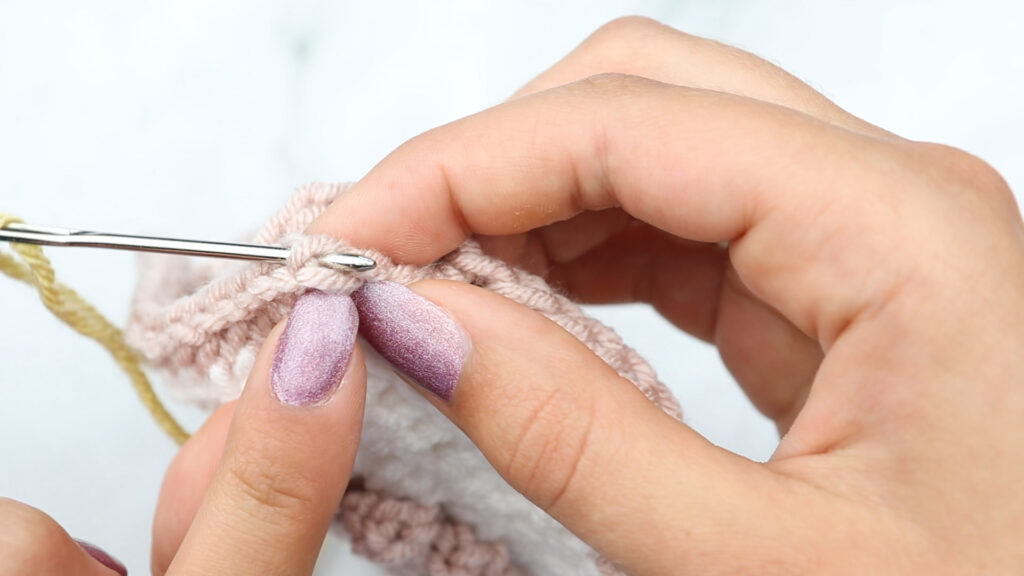
Now you are going to do the exact same thing on the 2nd square (however, because you have the right sides facing out on both your squares it will not look like you are doing the same thing). Just remember that when you are working on the other square so it doesn’t get confusing.
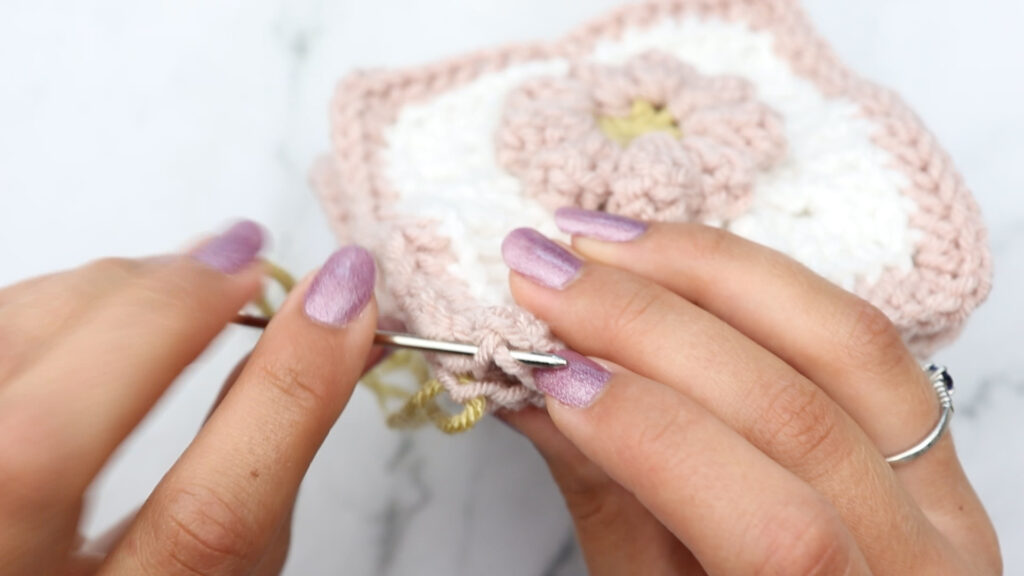
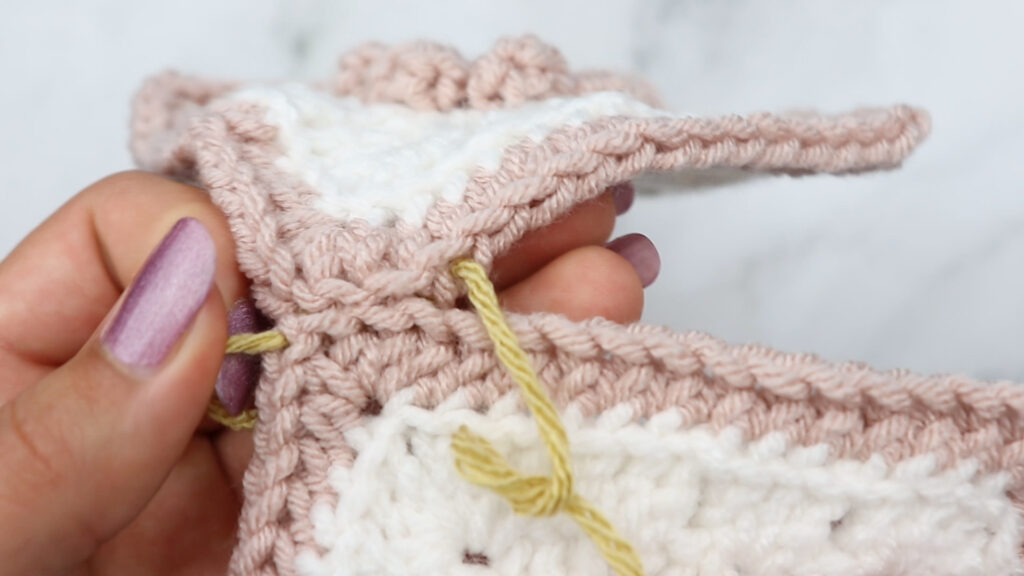
Repeat instructions above. *From the right side of your square you will insert your darning needle through the back loop only of the st you had gone into before (see below pic), then turn your needle and coming from the back go through the next stitch, do the same thing on the 2nd square and pull your yarn through, repeat from*
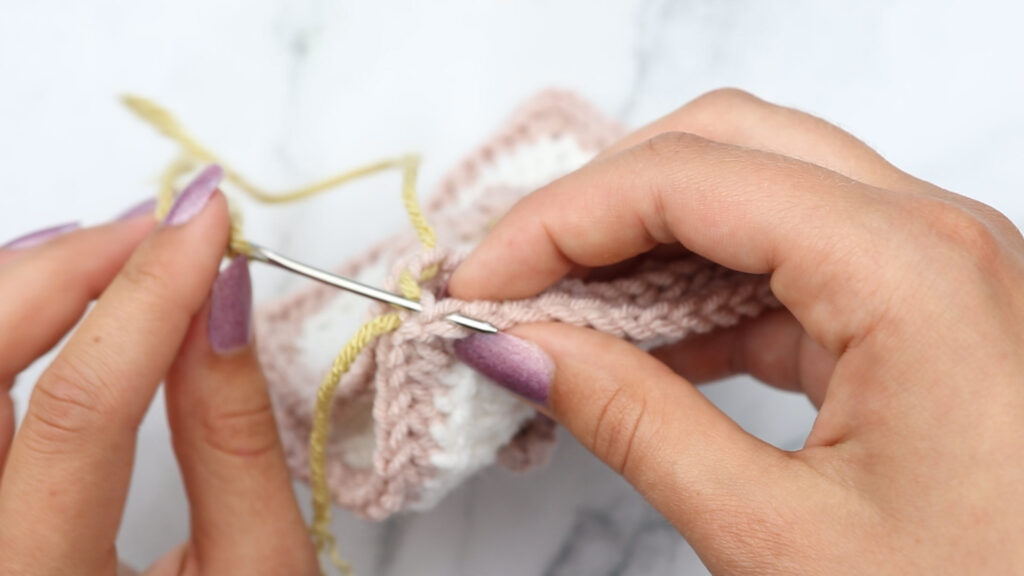
Once you have completed 5-7 sts you will pull on each side of the yarn to tighten.
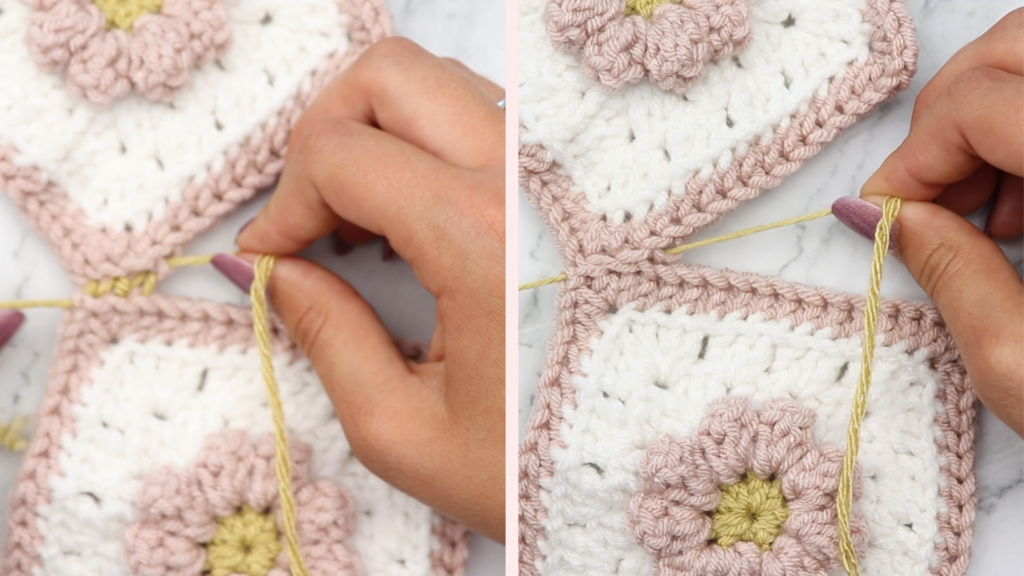
This is how it should be looking! Just continue doing all the instructions until you finish joining the squares.
How to Join Granny Squares with a Slip Stitch in the Back Loop Only:
This is a really quick way to join ganny squares, so if you’re looking for the quick and easy way this would be for you!
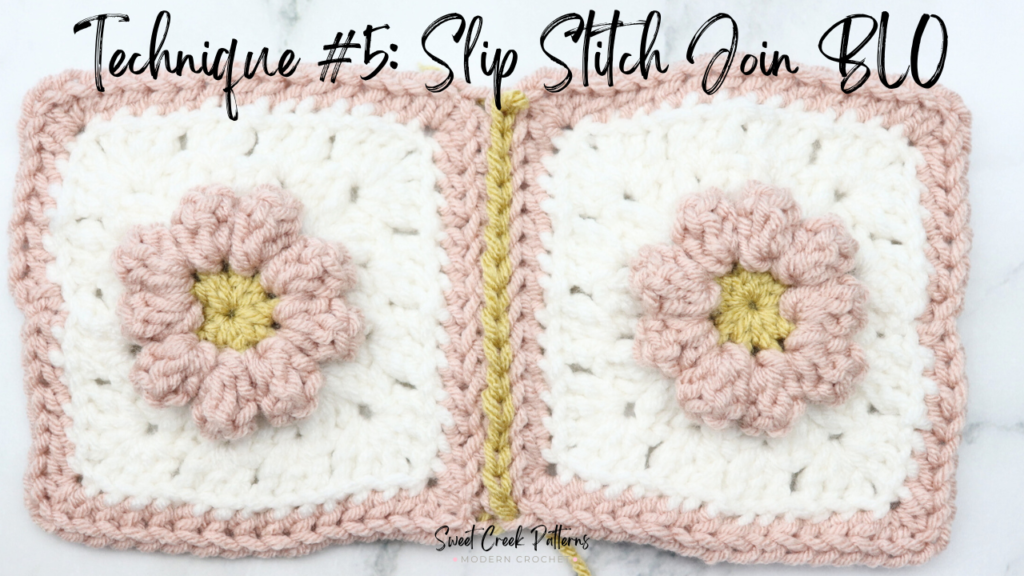
How to join your Granny Squares using the:
Slip Stitch Join in Back Loop Only
With right sides facing out, you will insert the same hook you used for your granny square into the back loop only of the first square, and then the back loop only of the second square.
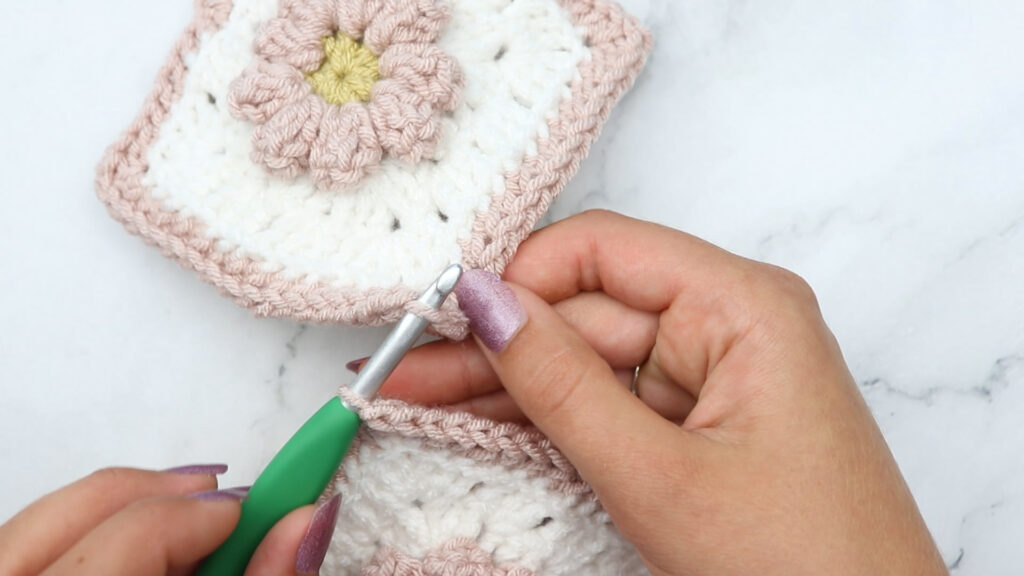
Now with those loops still on your hook you will pull the yarn through both loops.
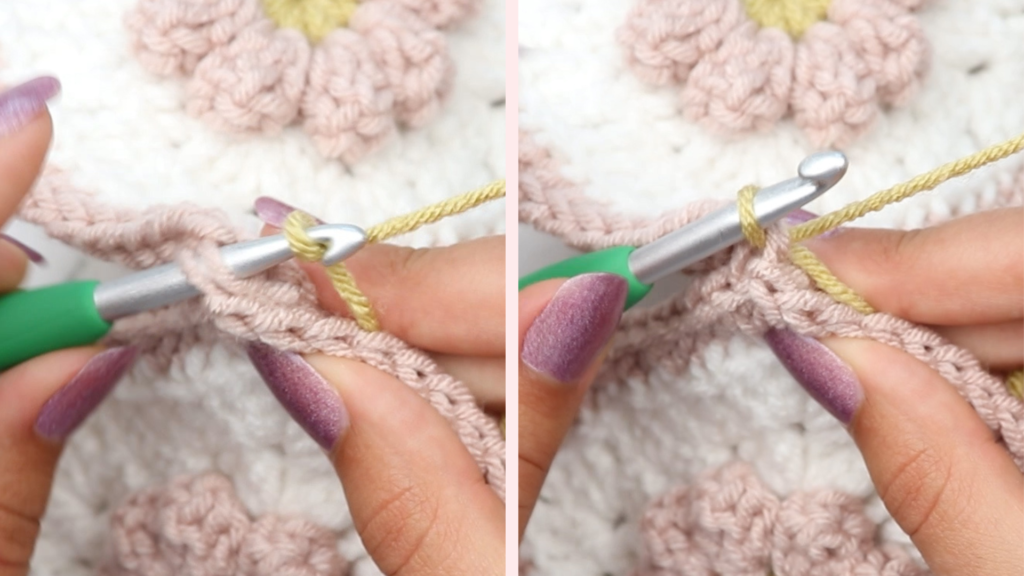
Now, you will need to insert your hook into the back loop only of the first square.
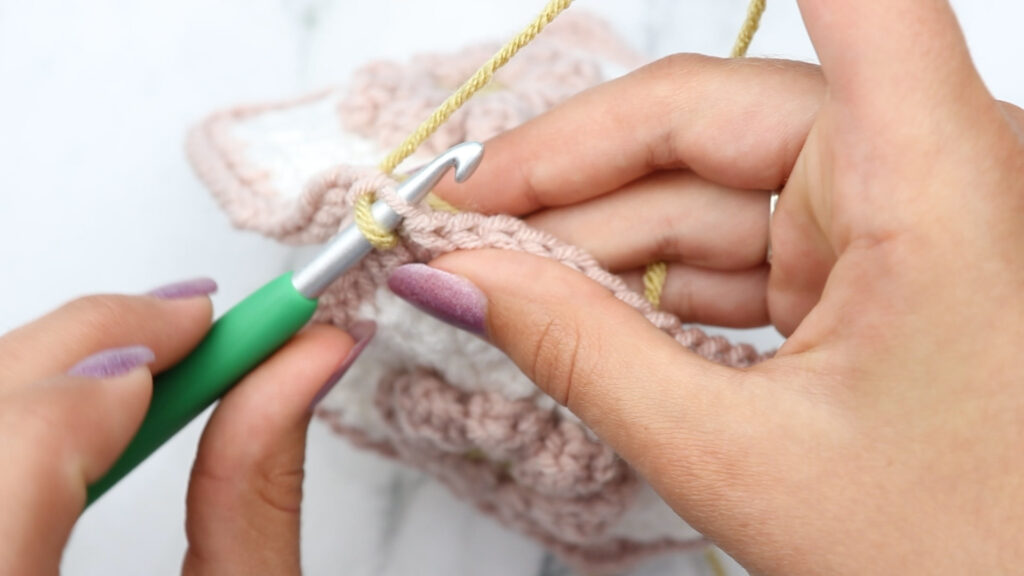
Then making sure your working yarn is below the granny square then insert your hook into the back loop only of the second square, then yarn over and pull through.
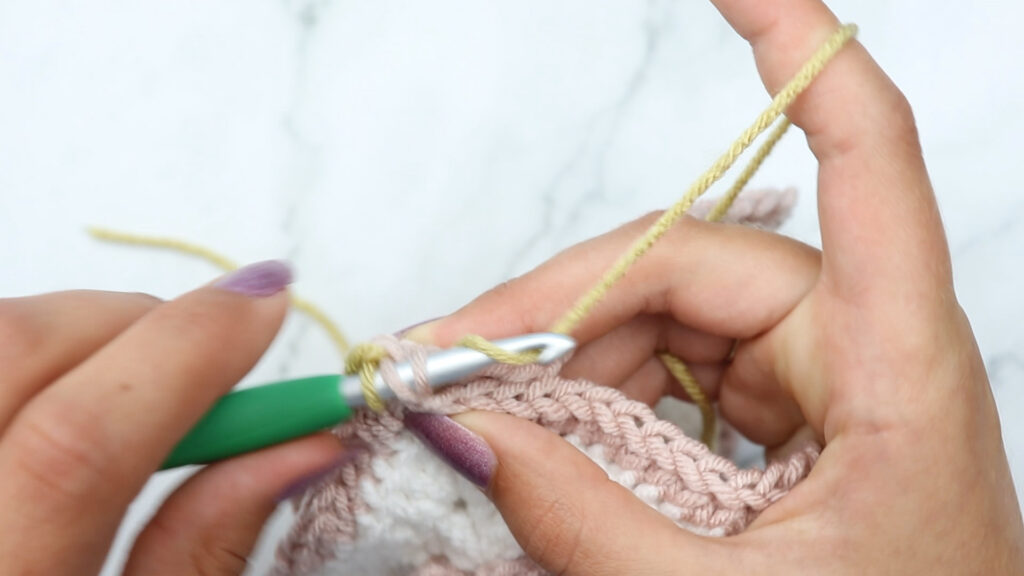
Now you will simply repeat that. *Insert your hook into the back loop only, and then making sure your yarn is below your hook grab the back loop of the second square, then yarn over and pull through all 3 loops, repeat from*
This is how it should look once you finish joining the squares.
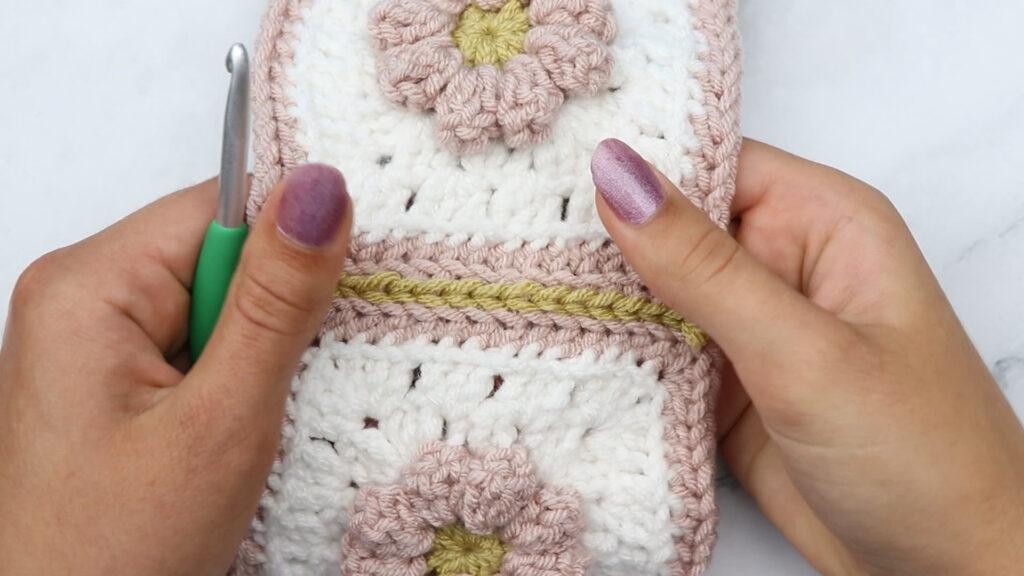
How to Join Granny Squares by Single Crocheting on the front side:
This is another really quick and easy technique!
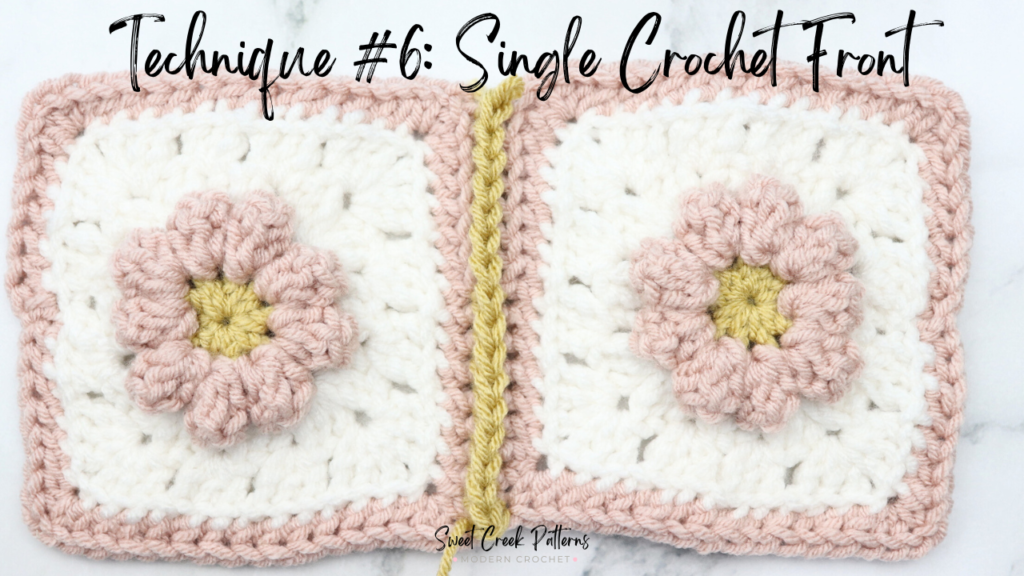
How to join your Granny Squares using the:
Single Crochet Stitch
Making sure the front of both sides face out, insert your hook into both stitches of the first square, then insert your hook through both loops of the second square.
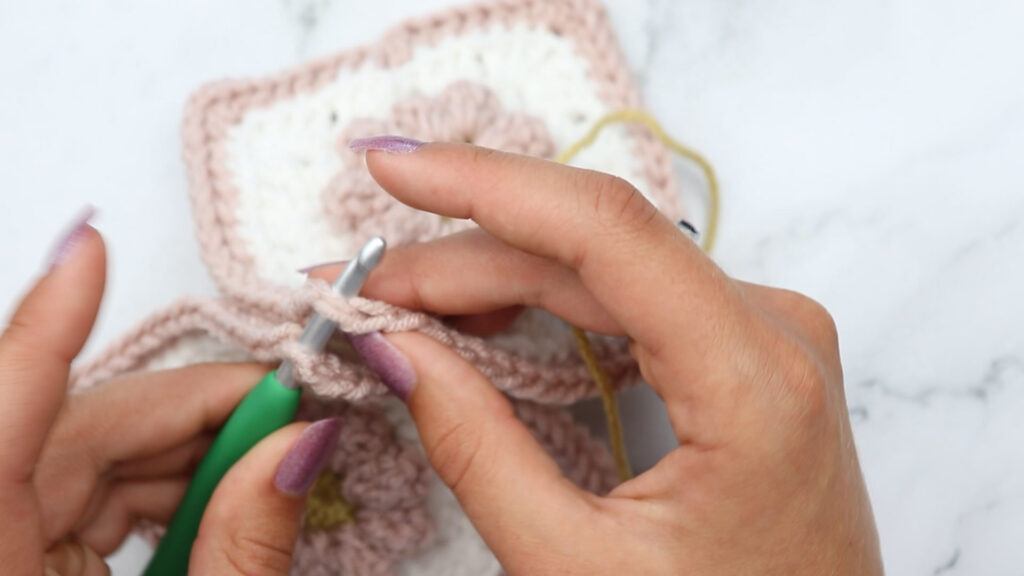
Yarn over and pull through.
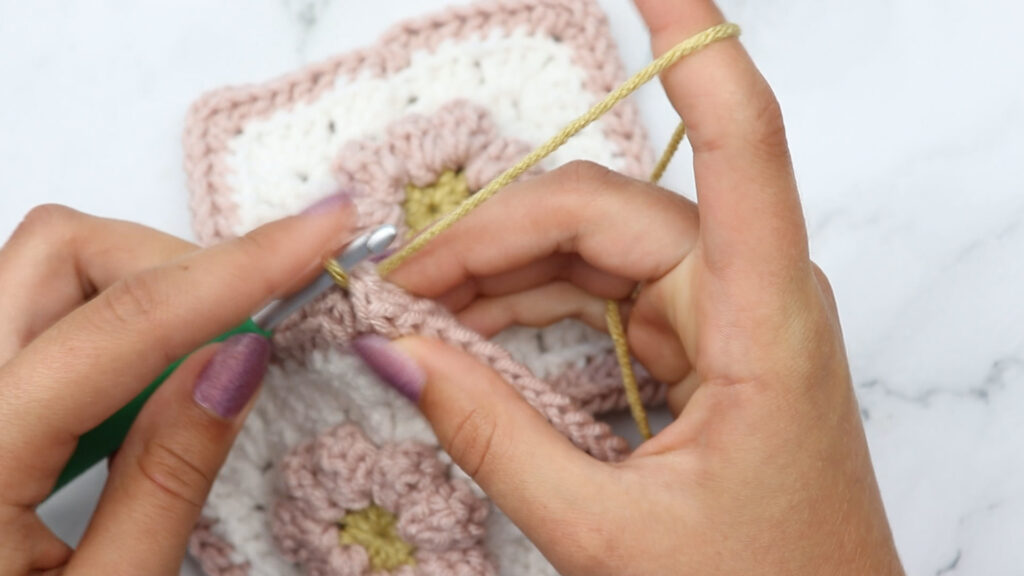
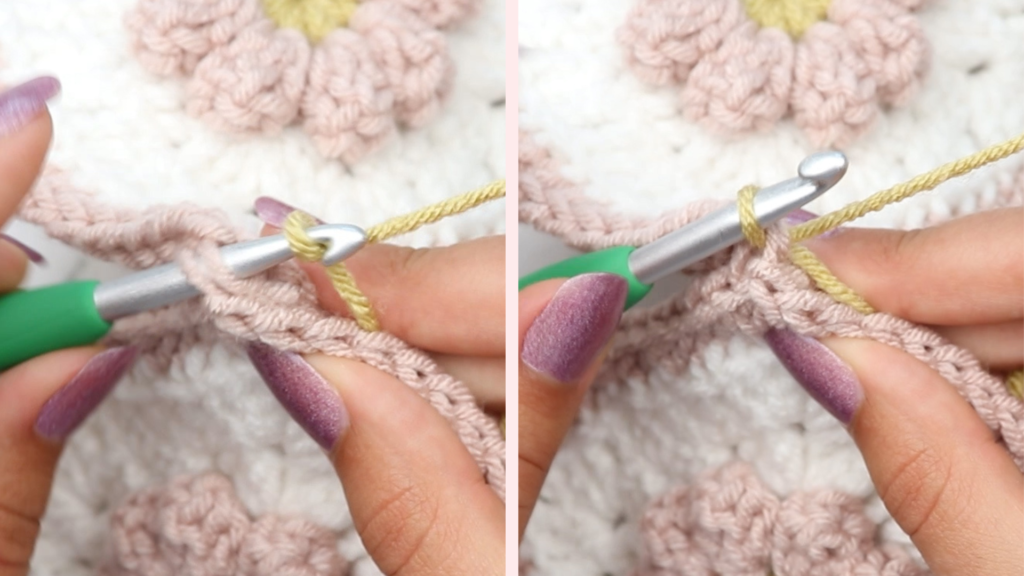
This is what the wrong side will look like.
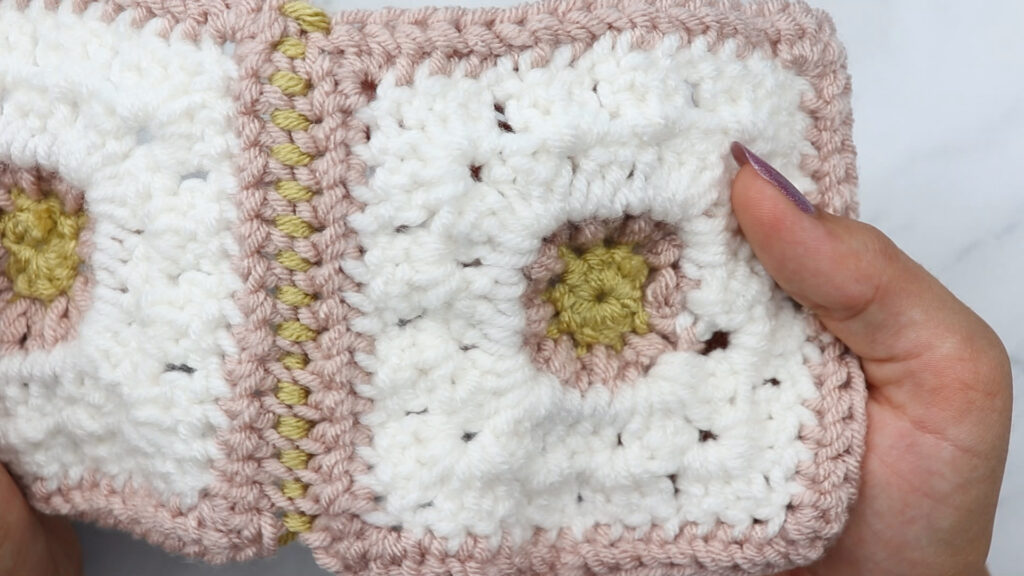
How to Join Granny Squares with the Single Crochet in the Back:
This another really neat option!
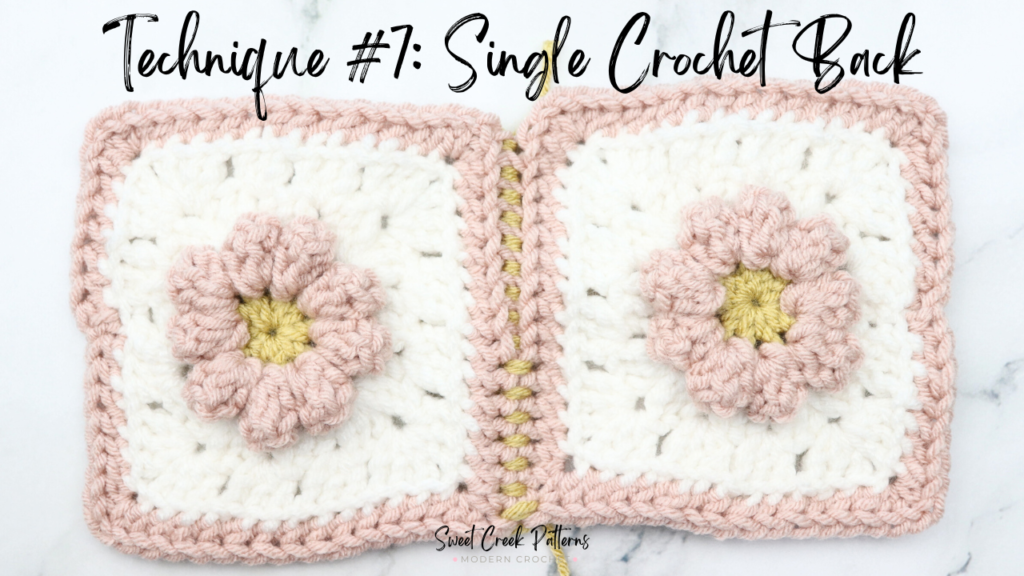
How to join your Granny Squares using the:
Single Crochet Back
You have 2 options with this:
1. Sc in the back with both loops
2. Sc in the back with the back loops only
Insert your hook into the corners st (wether blo or both loops).
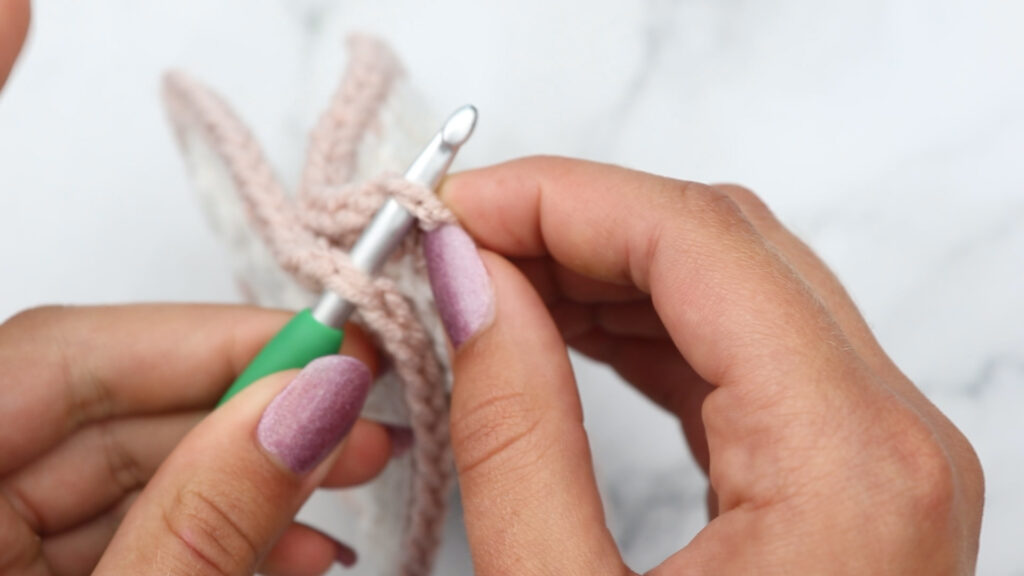
Grab the working yarn, then yarn over and pull through.
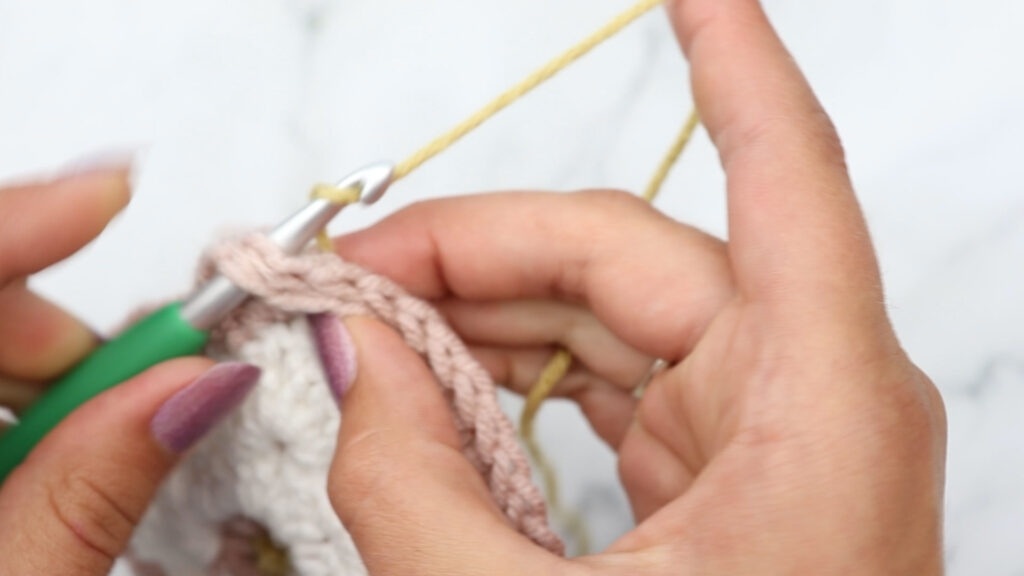
Now you will simply insert your hook through the first square and second square and then make a sc like normal. This is how it should look if you work through BOTH loops.
Other Granny Squares Techniques from Sweet Creek Patterns
Blocking Granny Squares Blogpost
The Wildflower Granny Square Blanket Blogpost
The Wildflower Granny Square Blanket Pattern
The Wildflower Granny Square Blanket Tutorial

